微信小程序
课程目标:了解微信小程序基本概念,搭建开发环境,掌握常用基础组件与样式,完成第一个开屏页面。
day1 微信小程序入门
1. 介绍微信小程序
1.1 什么是微信小程序?
微信小程序(Mini Program)是腾讯微信推出的一种无需下载安装、即用即走的轻量级应用程序。用户可以在微信 App 中直接打开,无需安装卸载,占用空间极小。
1.2 小程序 vs 普通网页 vs App
| 对比项 | 普通网页 | App | 微信小程序 |
|---|---|---|---|
| 安装 | 不需要 | 需要 | 不需要 |
| 开发技术 | HTML/CSS/JS | Swift/Java/Flutter | WXML/WXSS/JS |
| 入口 | 浏览器 | 应用市场 | 微信扫码/搜索 |
| 发布审核 | 无 | 较繁琐 | 腾讯平台审核 |
| 离线能力 | 弱 | 强 | 中等 |
| 调用设备能力 | 有限 | 强 | 强(蓝牙/摄像头/位置等) |
1.3 小程序的应用场景
- 电商购物(拼多多小程序、京东小程序)
- 工具类(计算器、翻译、天气)
- 内容资讯(新闻、小说)
- 生活服务(外卖、预约挂号)
- 企业内部系统(IOT 监控、考勤)
1.4 小程序开发特点
- 双线程模型:渲染层(WebView)+ 逻辑层(JSCore),互相独立
- 组件化开发:类似 Vue,每个页面由
.wxml+.wxss+.js+.json四个文件组成 - 丰富的原生 API:
wx.request、wx.navigateTo、wx.getLocation等几百个 API
2. 安装小程序开发环境
2.1 注册微信小程序账号
注册步骤:
- 打开上方链接 → 点击「立即注册」
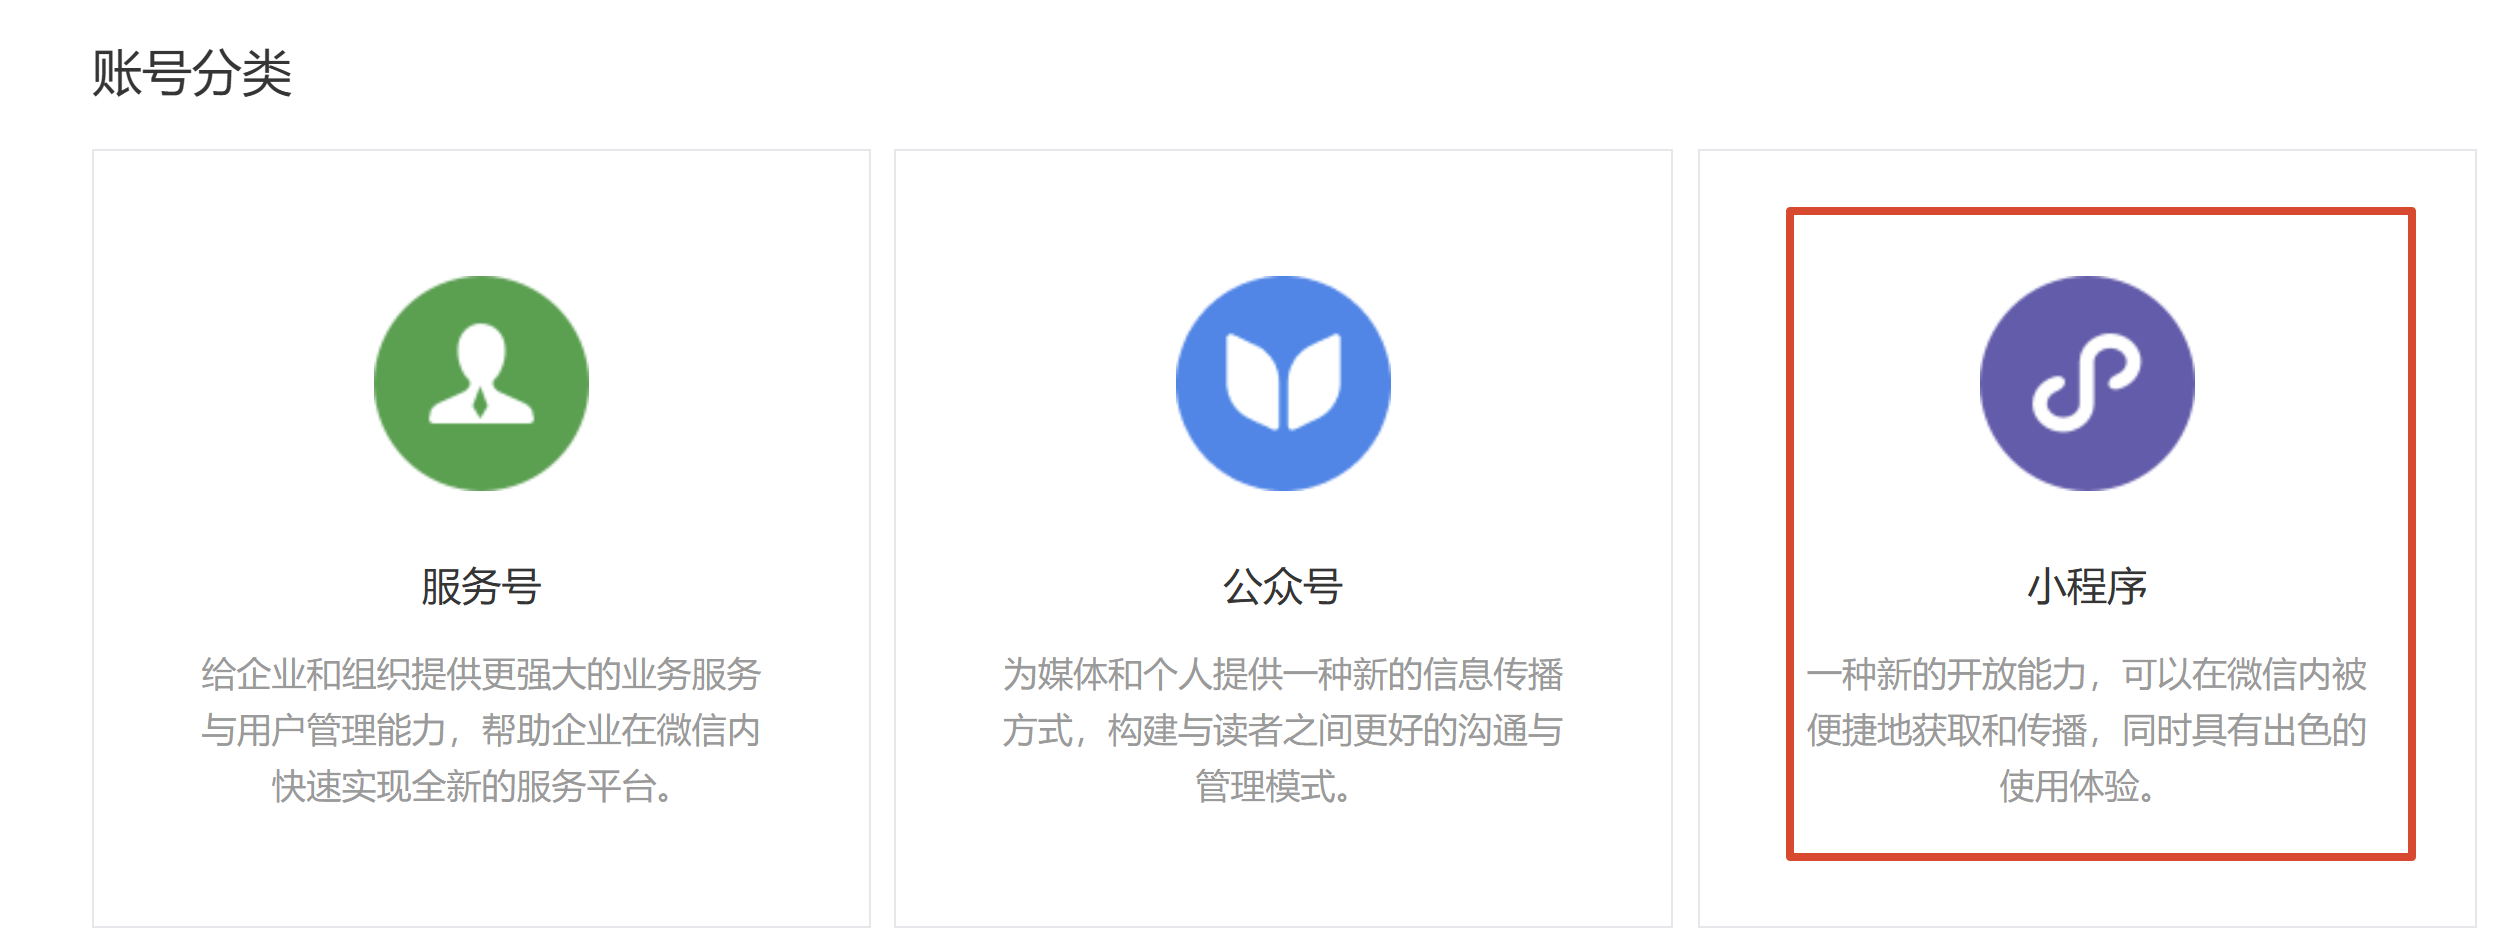
- 选择账号类型:小程序
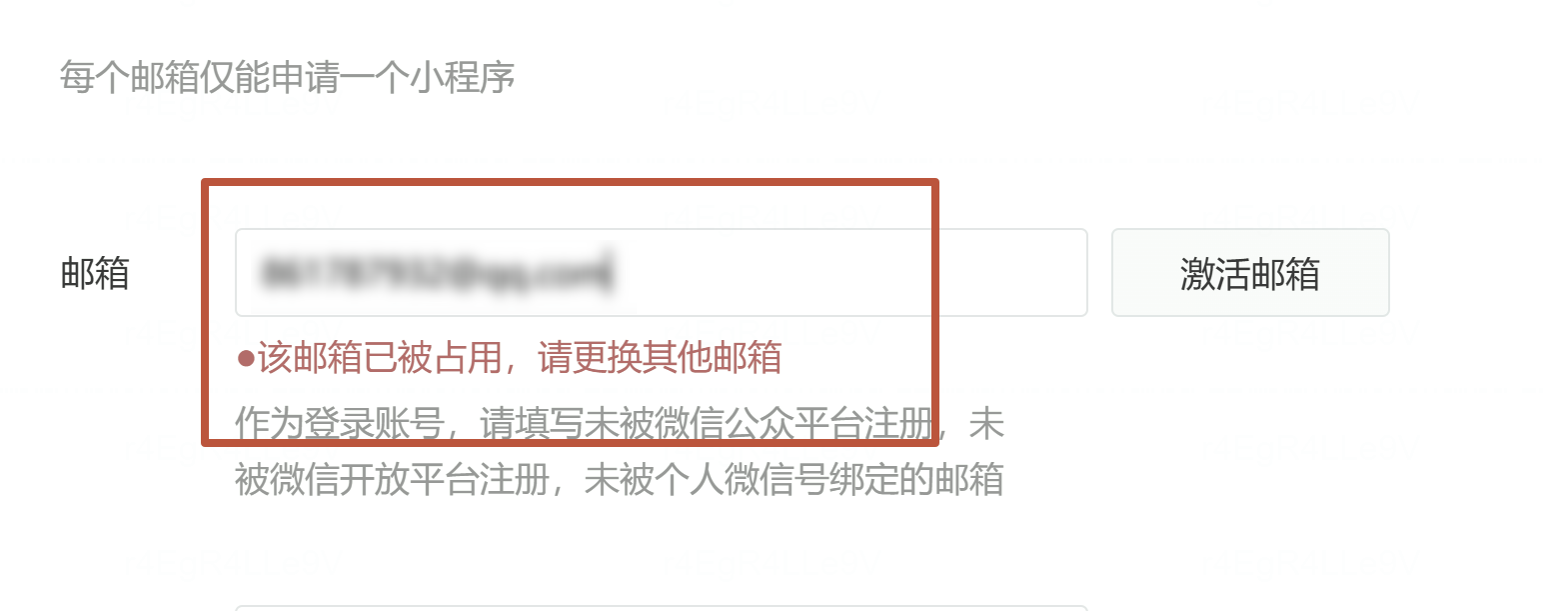
- 填写邮箱 + 设置密码(邮箱需未注册过公众号/小程序)
- 激活邮箱 → 完善主体信息(个人开发者选「个人」)
- 登录后台 → 左侧「开发管理」→「开发设置」→ 找到 AppID
⚠️ AppID 很重要,后面创建项目时需要填写!
2.2 下载微信开发者工具
下载地址:https://developers.weixin.qq.com/miniprogram/dev/devtools/download.html
安装步骤:
- 打开上方链接,根据系统选择 Windows 64位 或 macOS 版本下载
- 双击安装包,默认安装即可
- 安装完成后打开,扫码登录(使用注册过小程序的微信扫码)
2.3 开发者工具界面介绍
┌──────────────────────────────────────────────────┐
│  菜单栏(文件/编辑/工具/设置)                        │
├──────────────┬───────────────────┬───────────────┤
│  文件目录树   │    代码编辑区       │  模拟器预览    │
│  (左侧)    │    (中间)         │  (右侧)     │
├──────────────┴───────────────────┴───────────────┤
│  调试控制台(Console / Network / Sources 等)       │
└──────────────────────────────────────────────────┘
- 模拟器:实时预览小程序效果,可切换手机型号
- 编辑器:写代码的区域
- 调试器:Console 查看输出,Network 查看网络请求
3. 创建一个小程序
3.1 新建项目步骤
- 打开微信开发者工具 → 点击「+」新建项目
- 填写项目信息:
- 项目名称:自定义(如
my-first-miniapp) - 目录:选择一个空文件夹
- AppID:填写刚才注册的 AppID(测试可用
test临时 ID) - 开发模式:选「小程序」
- 后端服务:不使用云服务(初学选这个)
- 项目名称:自定义(如
- 点击「确定」,工具会自动生成基础模板
3.2 Hello World 示例
打开 pages/index/index.wxml,修改内容:
<view class="container">
  <text>Hello, 微信小程序!</text>
</view>
保存后,右侧模拟器立即刷新显示。
day2 微信小程序入门
1 复习
1 小程序 入门门槛低、受众广 10亿、可以0成本的发布项目
2 微信小程序开发工具【官方工具】https://developers.weixin.qq.com/miniprogram/dev/devtools/download.html
3 项目的结构

components 跟导航栏相关
pages 局部 里面存放的是每一个页面的内容
    .js 数据和交互
    .wxml 内容
    .wxss 样式
    .json 导航栏的配置项
static 自定义的静态文件夹 里面放静态资源 图片、音频、视频、图标
全局 【作用于所有页面】
    app.json 全局的页面配置项 设置开始的是哪一个页面,还可以去设置导航栏
    app.js  全局的数据和交互
    app.wxss  全局的样式
    project.config.json  项目的配置项
        导入别人的项目时 "appid": "wxd14f7ff58a488cfc", 一定要修改 wx8bec6225c738b413

组件
    text  文本 文字 可以使用text
    view  盒子 组件 所有的内容都需要放到盒子里面
        外边距 margin
        内边距 padding
        边框 border
    image 图片组件

页面跳转
js数据
欢迎页面
尺寸
2 JS数据和交互
data: {

  },

onLoad(options) {
     console.log("1 欢迎页面加载成功");
      // 计时员
    setTimeout(() => {
      wx.redirectTo({
        url: "/pages/index/index",
      })
    }, 5000);
},
3 wxss 100%背景
/* .container  100vh 就是适配所有设备的高度 */
/* .container{
  width: 100%;
  height: 100vh;
  background-color: yellowgreen;
} */

/* page 给背景 */
page{
  background-color: blueviolet;
}
4 轮播图 swiper、swiper-item
<swiper class="sw" indicator-dots="true" autoplay interval="2000" duration="2000" indicator-color="rgba(200,0,0,0.3)"   indicator-active-color="rgb(0,200,0)">
  <swiper-item >
    <image src="/static/001.jpg" mode="widthFix" class="image" />
  </swiper-item>
</swiper>
5 滚动条scroll
<scroll-view class="icon" scroll-x="true" >
    <view class="icon-item">
      <view class="icon-img">
        <image src="/static/h001.webp" mode="widthFix"/>
      </view>
        <view>华为手机</view>
    </view>
</scroll-view>
6 弹性盒子 Flex
wxml
<view class="box1">
box1父盒子
  <view class="box1image">
  box1image子
    <image src="/static/jllogo.png" mode="widthFix"/>
  </view>
</view>

<view class="txbox">弹性盒子</view>

<view class="box2">
  <view class="boximage">
    <image src="/static/jllogo.png" mode="widthFix"/>
  </view>
</view>
wxss
/* pages/page3/page3.wxss */

.box1{
  border:1px solid red;
  margin-top: 120rpx;
}


.box1image{
  border:1px solid blue;
}

.box1image{
  width: 30%;
  /* background-color: blue; */
  /*
    margin:值1 上下左右
    margin:值1 值2  上下值1  左右 值2 盒子在水平方向居中
    margin:值1 值2 值3 值4  上右下左 顺时针
   */
  margin:0 auto;
  padding:20rpx 50rpx;
}

.box1image image{
  width: 100%;
}

.txbox{
  font-size: 30px;
  font-weight: bolder;
  color: red;
  /* border:1px solid red; */
  text-align: center;
}

.box2{
  border:5px solid yellowgreen;
  height: 900rpx;
}

.boximage{
  width: 30%;
  height: 220px;
  background-color: orange;
}

.boximage image{
  width: 100%;
}

/* 弹性盒子 */
/*
所有的操作都是在父盒子中进行的
  1 开启弹性盒子
  2 默认水平轴就是主轴
  3 justify-content 主轴设置永远用的是justify-content
  4 副轴永远用的是align-item

*/

/* 主轴是横轴的情况  */
/* flex-start center flex-end */
 /* 主轴是横轴 */
/* flex-start center  flex-end*/

/* .box2{
  display: flex;
  justify-content:center;
  flex-direction: row;
  align-items:flex-end;
} */

.box2{
  display: flex;
  flex-direction: column;
  justify-content: flex-end;
  align-items: center;
}
day3 API调用
1 复习
1 页面结构
内容 wxml
样式 wxss
数据和交互 js

2 js 数据和交互
    对象 {}
        键值对
        键:值,
    json
        有很多里面的文件都是json格式
    数据 data: 对象 json
    函数 交互
        函数名(){},
3 wxss 背景颜色
    .container{
        hight:100vh;
    }
    page{
        bgc:;
    }
4 轮播图
    swiper
       swiper-item
    直接查官方手册
5 滚动条
    scroll
       scroll-item
    直接查官方手册
       scroll-x scroll-y
       父盒子 white-space:nowrap;
       子盒子 display:inline-block;
6 弹性盒子 布局方式
    1 通过display:flex开启弹性盒子的布局
    2 所有的设置 都是在父盒子中完成的
    3 默认flex-direction:row 横轴为主轴 次轴纵轴  column
    4 所有的主轴设置位置 使用justify-content:flex-start center flex-end
    5 次轴位置的设置 使用的是align- items:flex-start center flex-end
2 小程序发布
微信小程序注册地址 https://mp.weixin.qq.com/
2.1 小程序注册

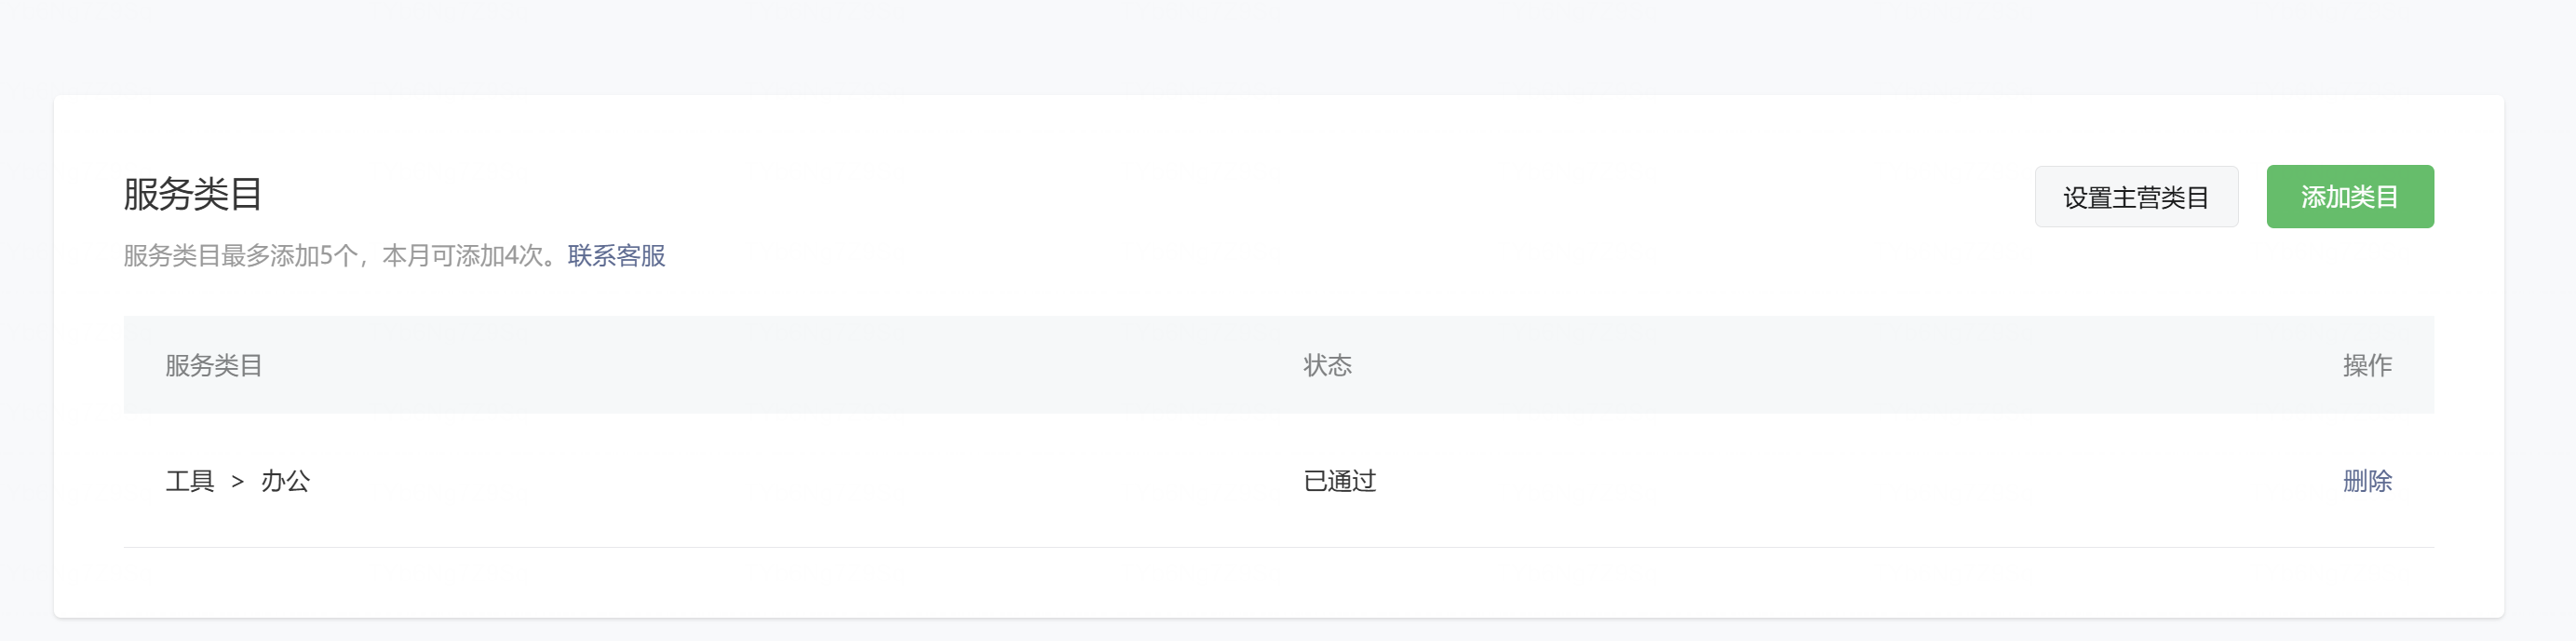
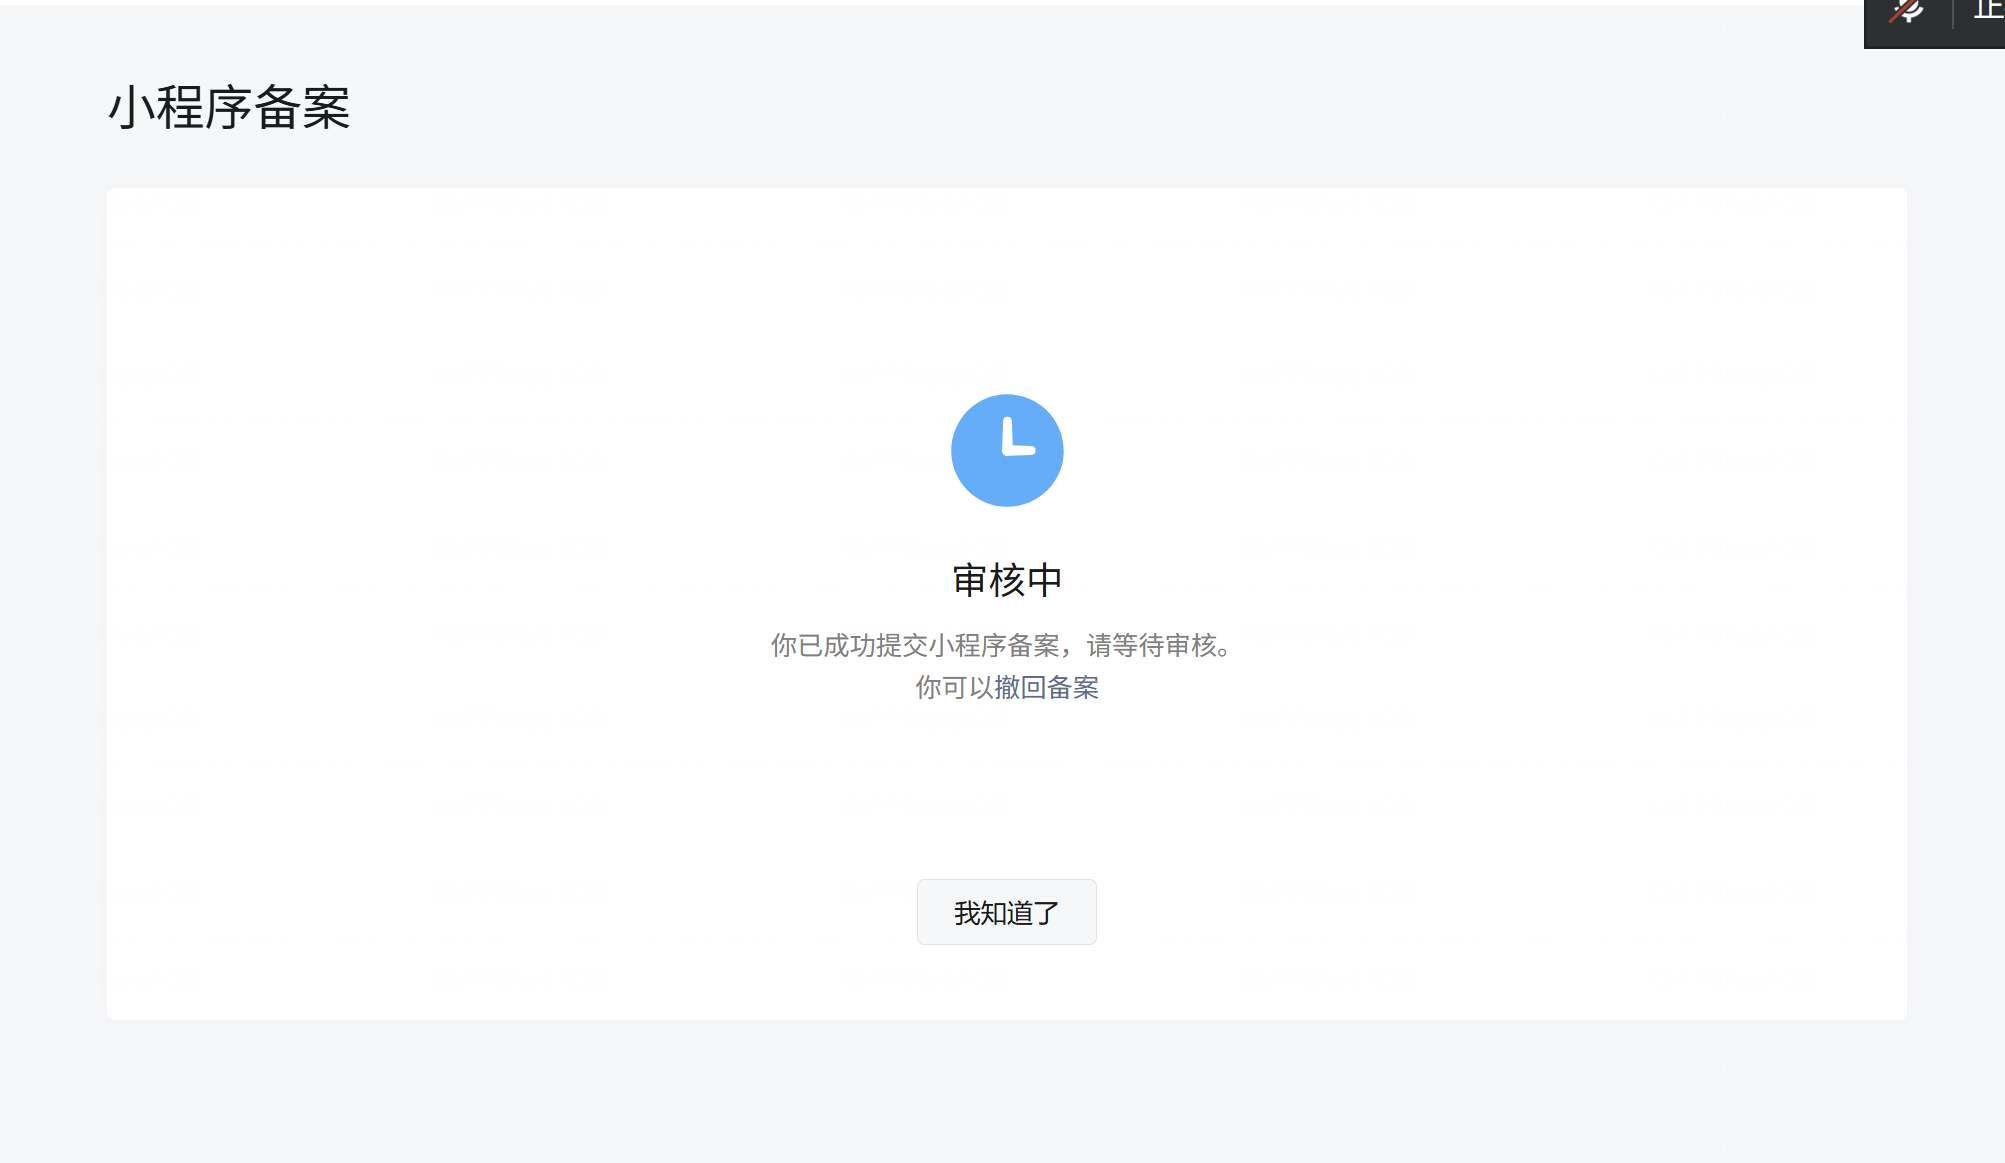
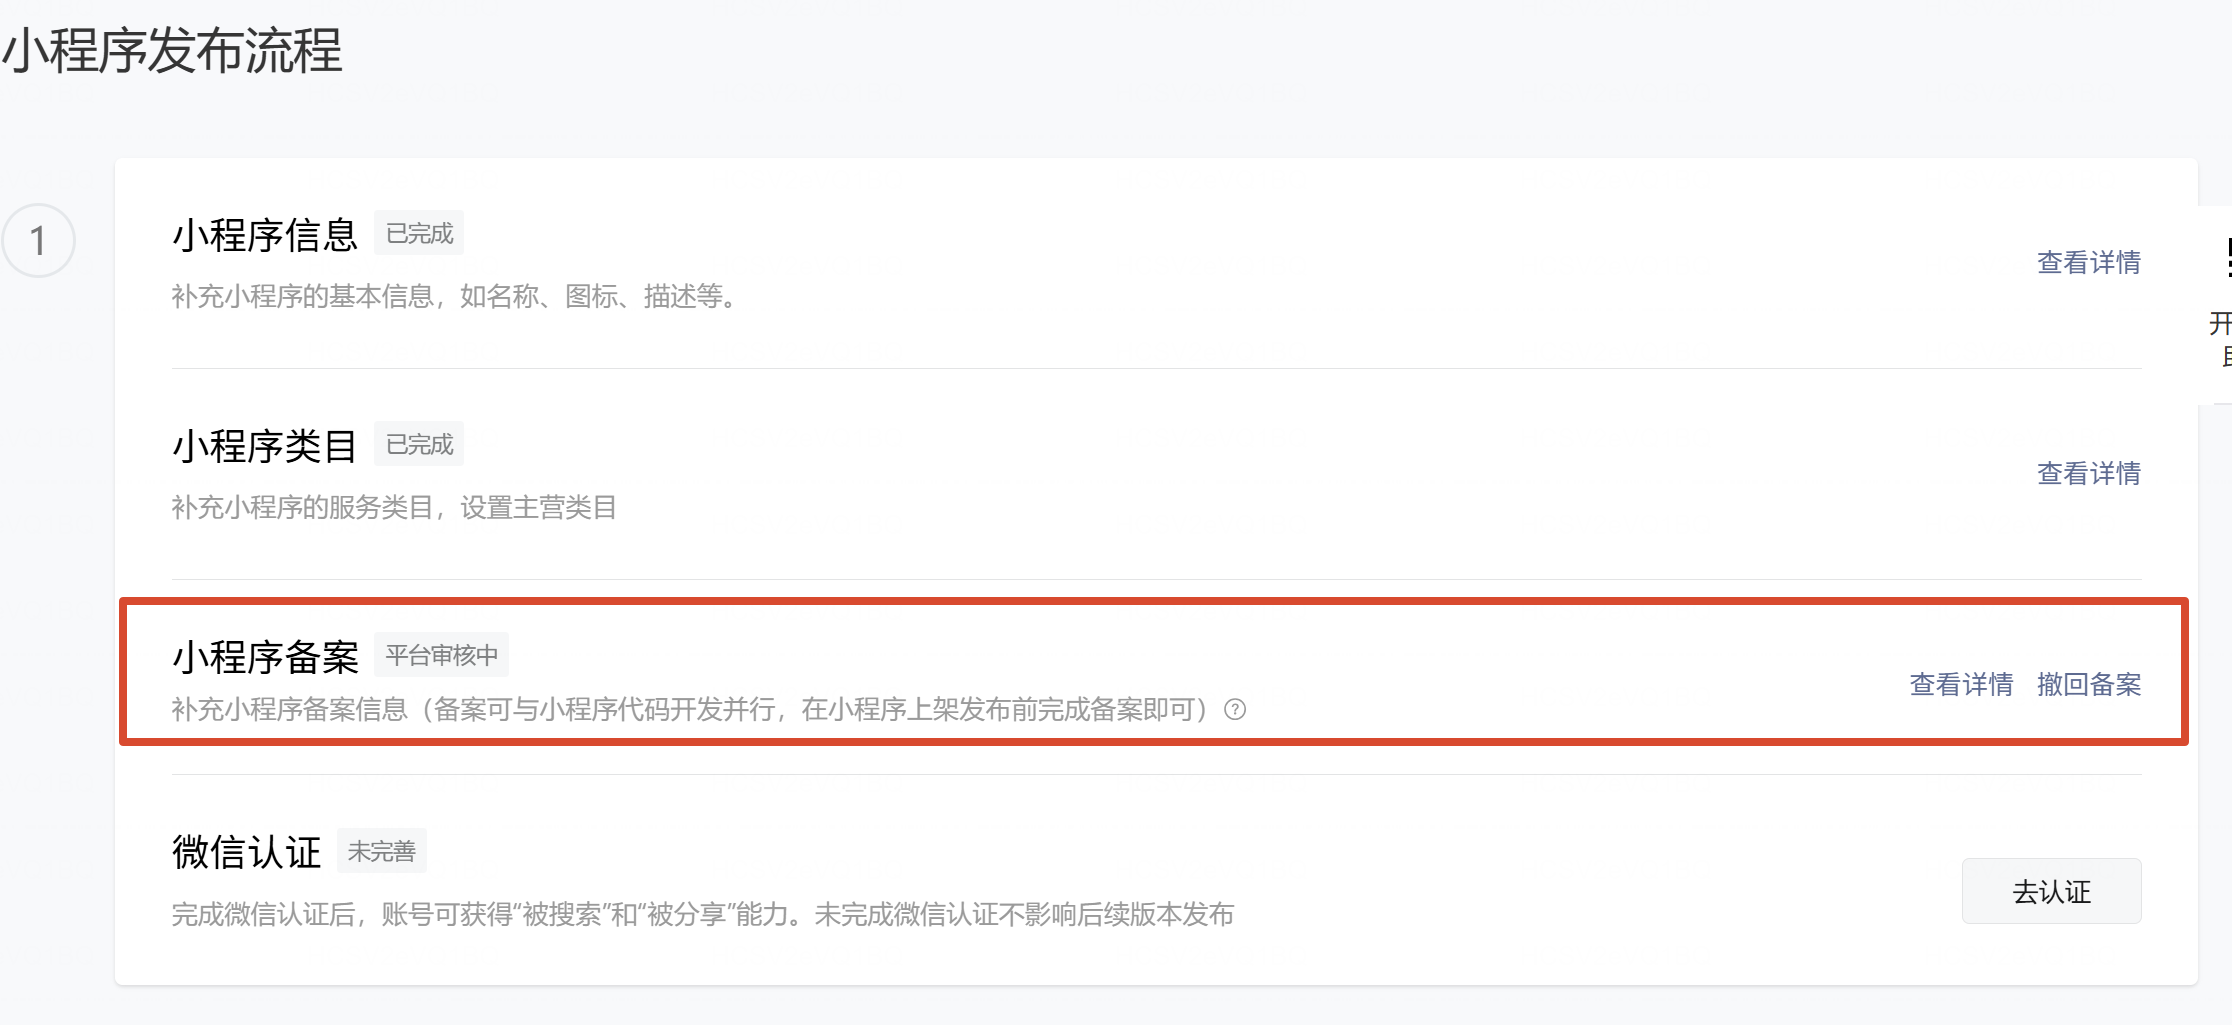
2.2 【备案==》小程序】选择类目 备案
小程序AI工具测试
2.3 代码上传

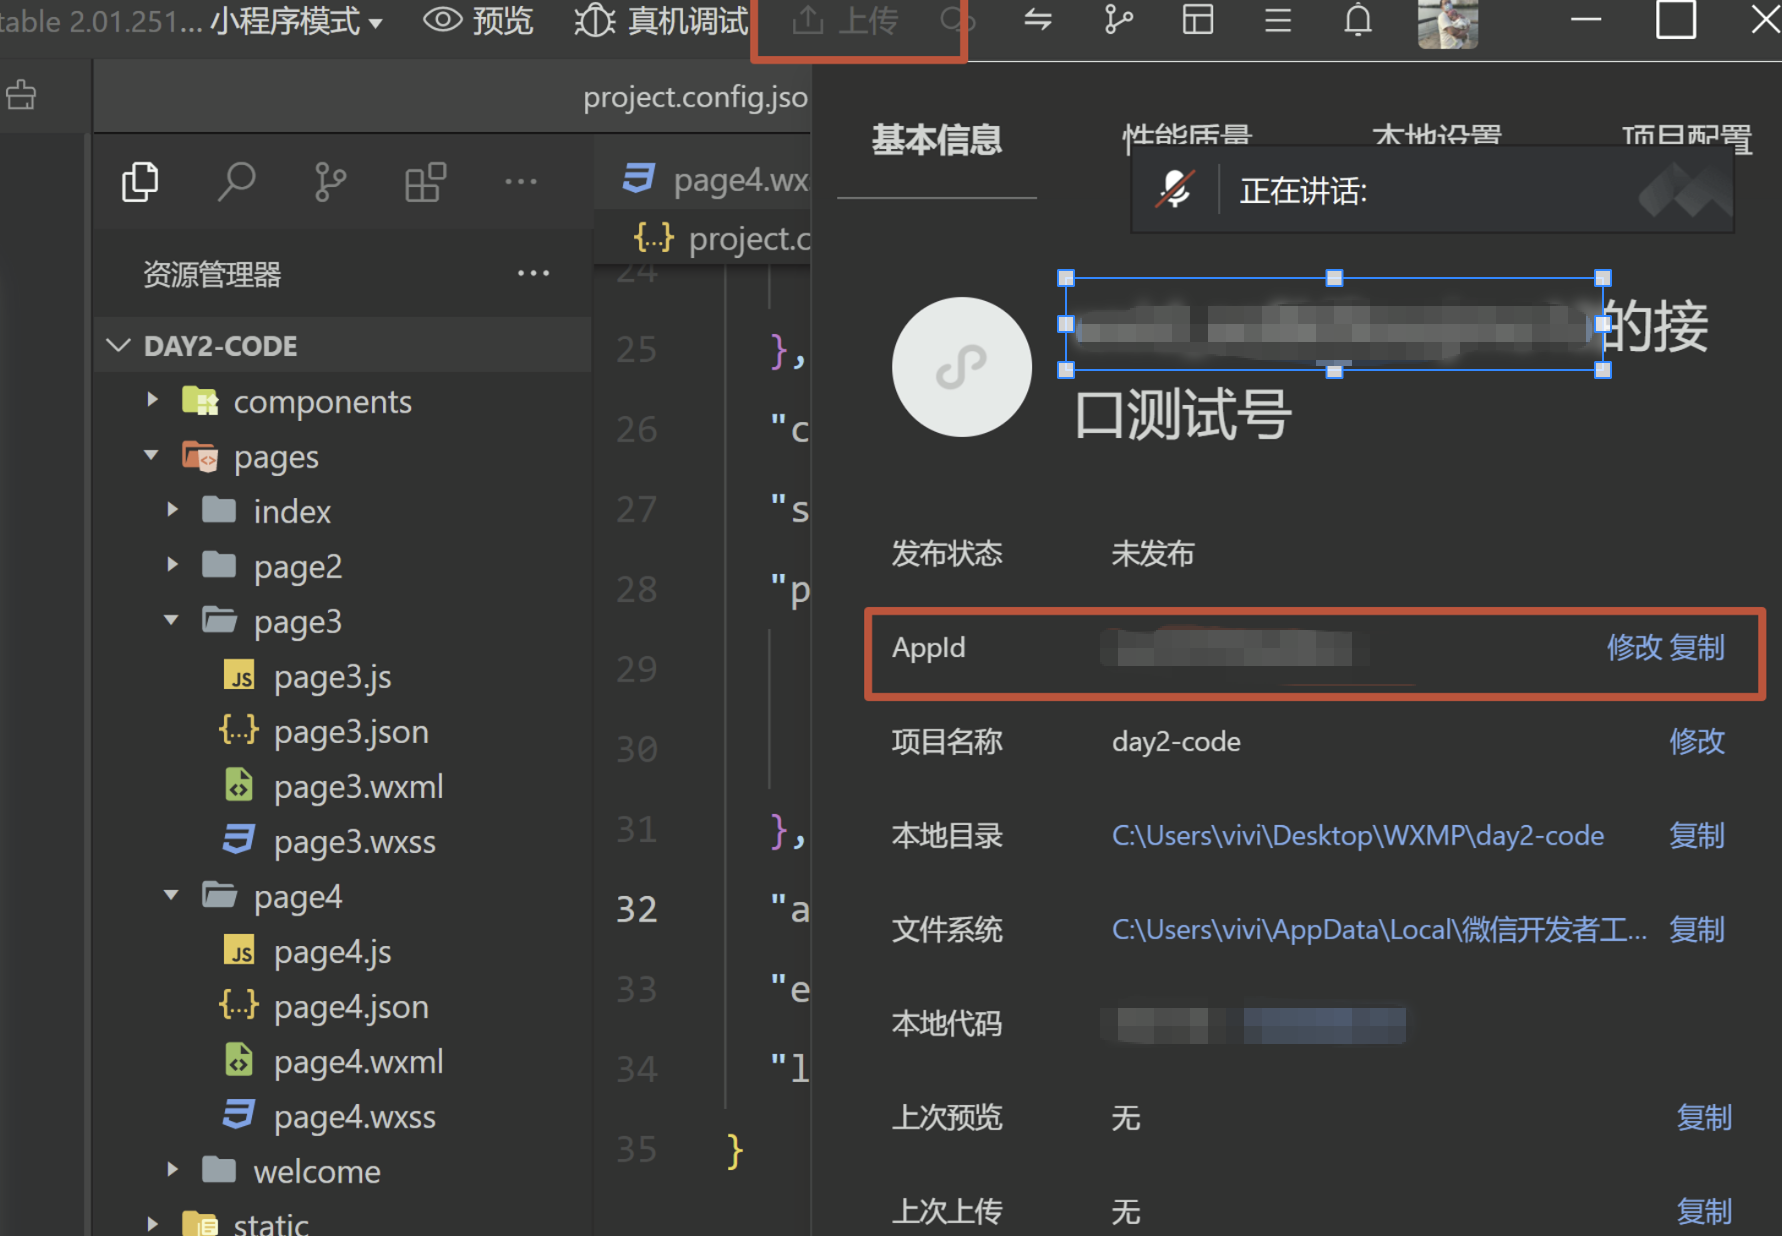
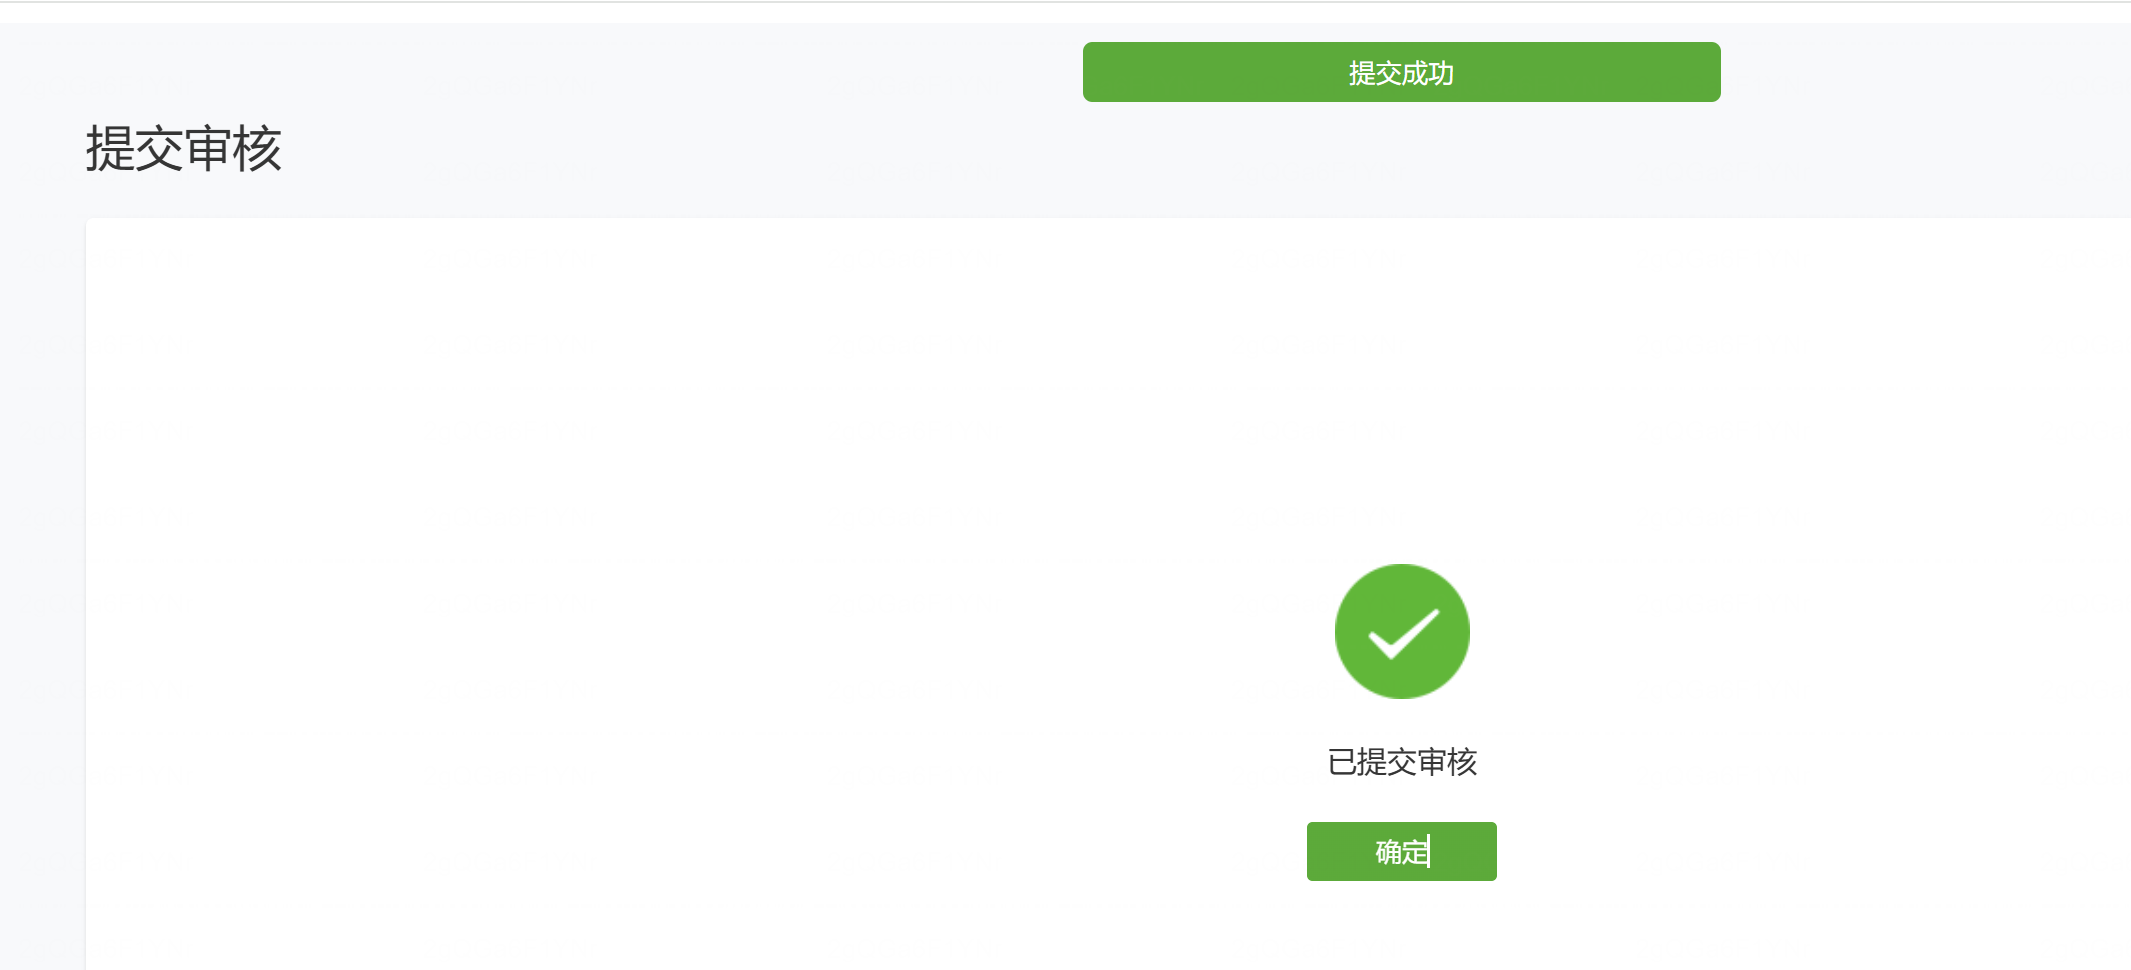
2.4 【审核==》代码】提交审核


3 选项卡
.json文件的格式
里面放的是对象
{},{}
.json文件的作用
1 作为配置文件
2 作为数据进行网络传输
"tabBar": {
    "color": "#999999",
    "selectedColor": "#4F46E5",
    "backgroundColor": "#ffffff",
    "borderStyle": "black",
    "list": [{
      "pagePath": "pages/index/index",
      "text": "首页",
      "iconPath": "/static/icon/拳击手套2.png",
      "selectedIconPath": "/static/icon/拳击手套1.png"
    },
    {
      "pagePath": "pages/page2/page2",
      "text": "第二页",
      "iconPath": "/static/icon/排球2.png",
      "selectedIconPath": "/static/icon/排球1.png"
    }
    ,
    {
      "pagePath": "pages/page3/page3",
      "text": "第三页",
      "iconPath": "/static/icon/曲棍球2.png",
      "selectedIconPath": "/static/icon/曲棍球1.png"
    }
    ,
    {
      "pagePath": "pages/page4/page4",
      "text": "第四页",
      "iconPath": "/static/icon/深蹲架2.png",
      "selectedIconPath": "/static/icon/深蹲架1.png"
    }
  ]
  }
4 导航栏显示标题
# 修改json
"usingComponents": {
    "navigation-bar": "/components/navigation-bar/navigation-bar"
}
# wxml
<navigation-bar title="第三页" back="{{true}}" home-button="{{true}}" color="black" background="#FFF"></navigation-bar>
5 登录页面
.inp{
  width: 300rpx;
  /* height: 40px; */
  border: 1px solid red;
  margin: 0 auto;
  margin-top: 20rpx;
  border-radius: 10px;
}

.inp input{
  /* font-size: 30px; */
  text-indent: 2px;
  height: 40px;
  margin-left: 20px;
  /* border: 1px solid blue; */
}
<view class="inp">
  <input type="text" placeholder="请输入用户名" bindinput="onUsernameInput"/>
</view>

<view class="inp">
  <input type="safe-password" password="true" placeholder="请输入密码" bindinput="onPasswordInput"/>
</view>

<view class="btn">
  <button bindtap="handleLogin">登录</button>
</view>
data: {
    username: '',
    password: ''
  },

  // 用户名输入
  onUsernameInput(e) {
    this.setData({ username: e.detail.value })
  },

  // 密码输入
  onPasswordInput(e) {
    this.setData({ password: e.detail.value })
  },

  // 登录验证
  handleLogin() {
    const { username, password } = this.data

    if (!username) {
      wx.showToast({ title: '请输入用户名', icon: 'none' })
      return
    }
    if (!password) {
      wx.showToast({ title: '请输入密码', icon: 'none' })
      return
    }

    if (username === 'vivi' && password === '123') {
      wx.showToast({ title: '登录成功', icon: 'success' })
      setTimeout(() => {
        wx.switchTab({ url: '/pages/index/index' })
      }, 1000)
    } else {
      wx.showToast({ title: '用户名或密码错误', icon: 'none' })
    }
  },
6 【数据爬虫和接口】数据绑定v-for
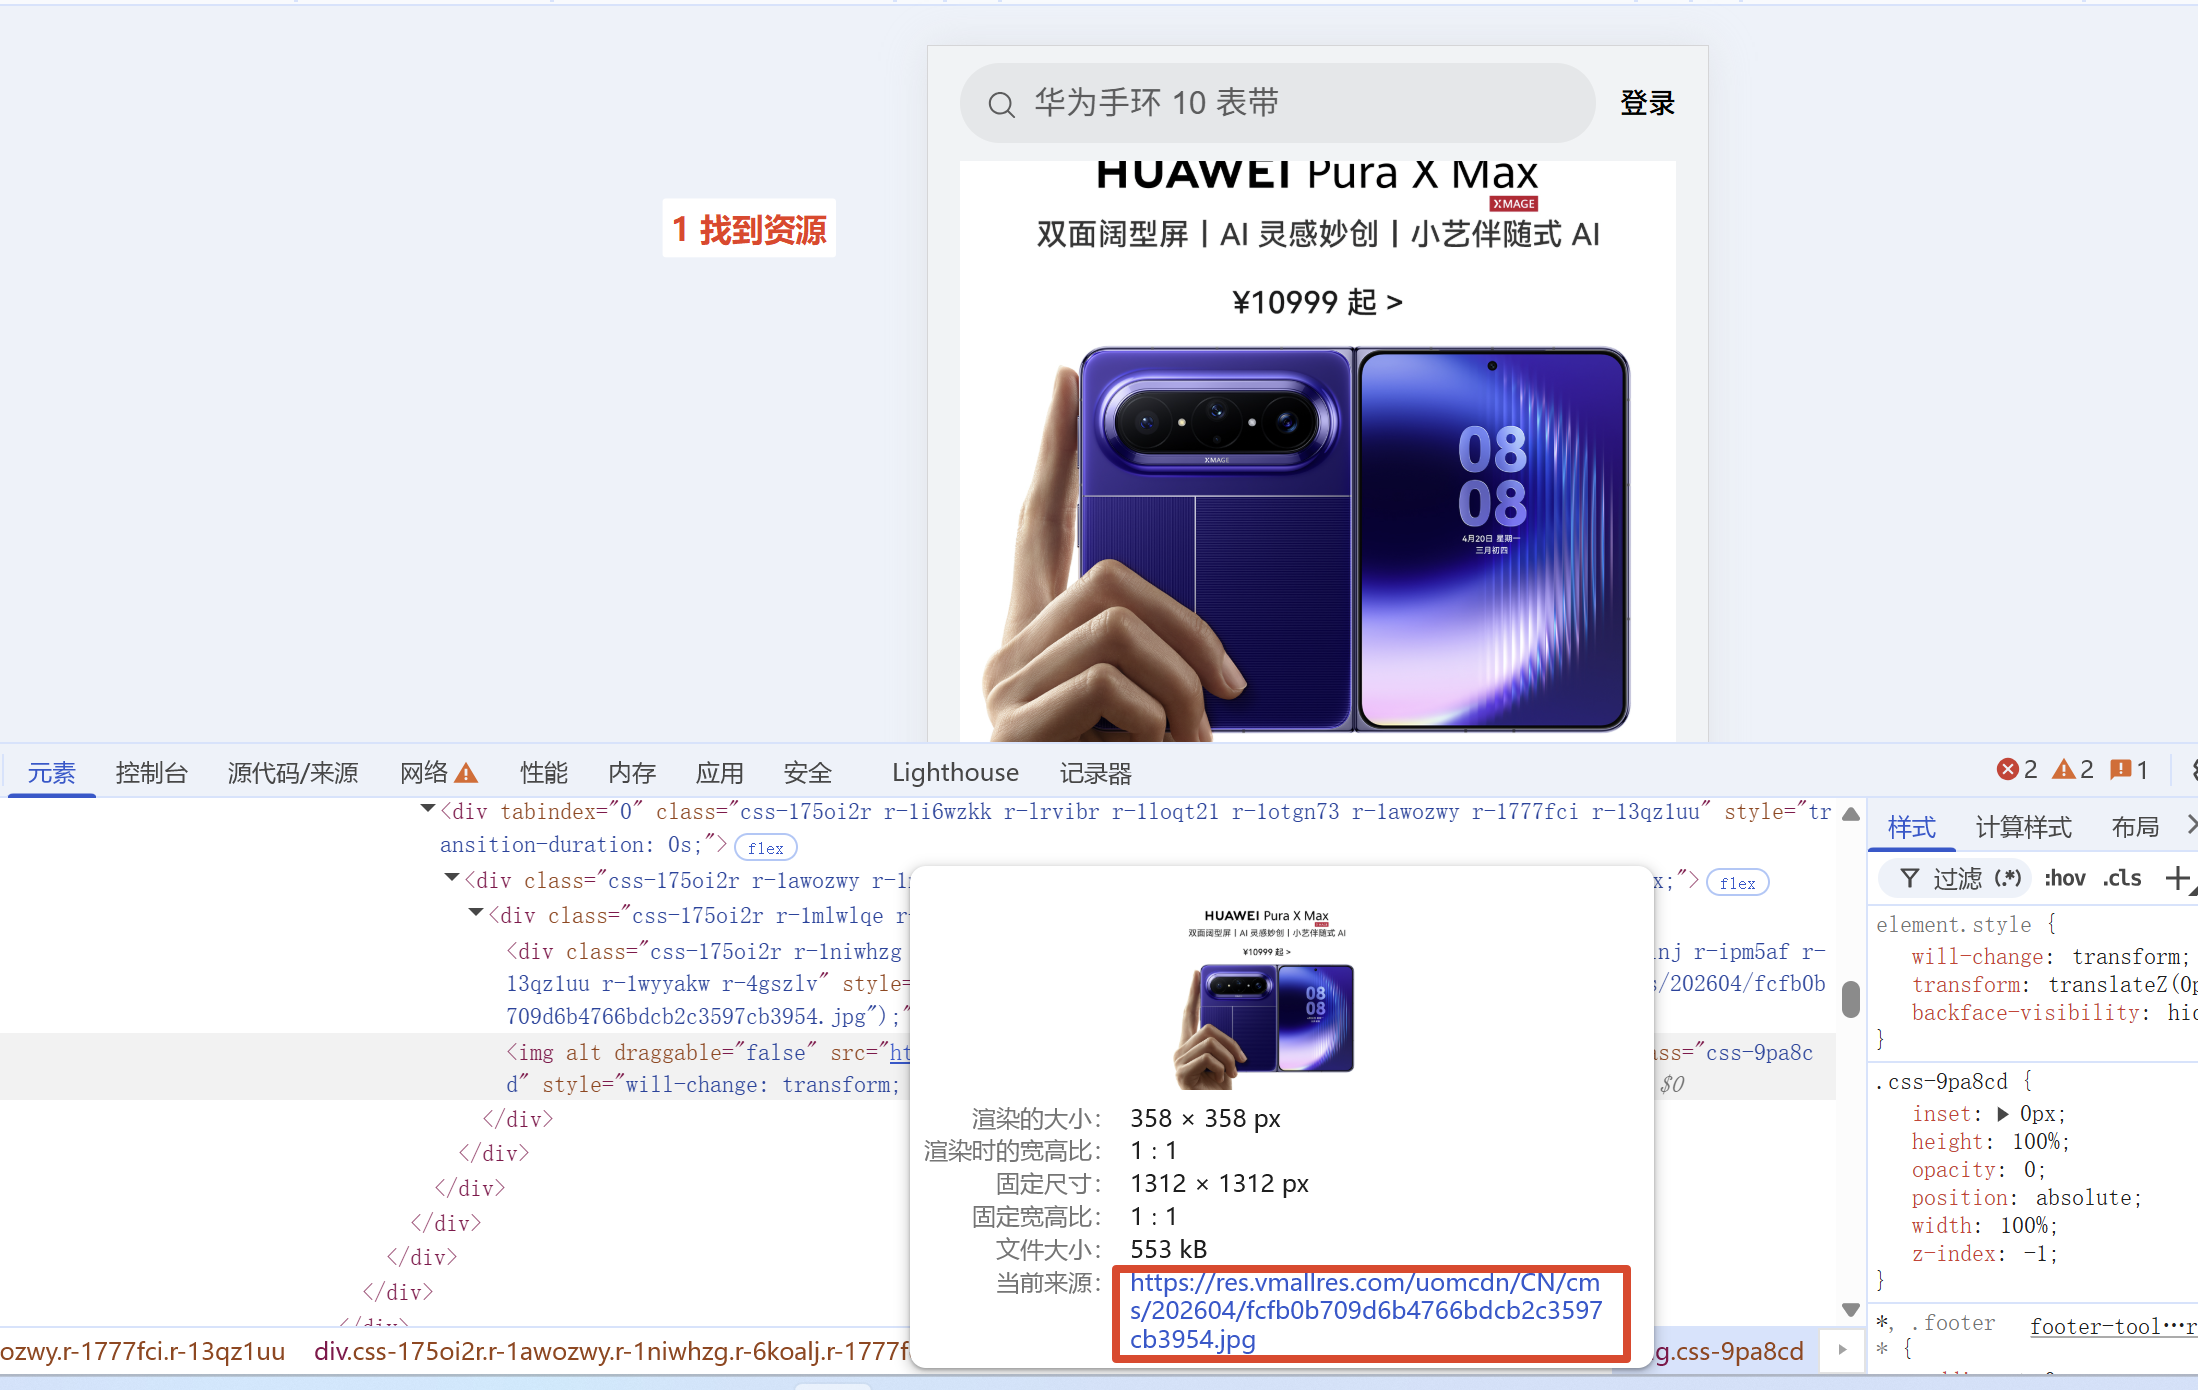
6.1 确定要找的资源
6.2 分析接口地址
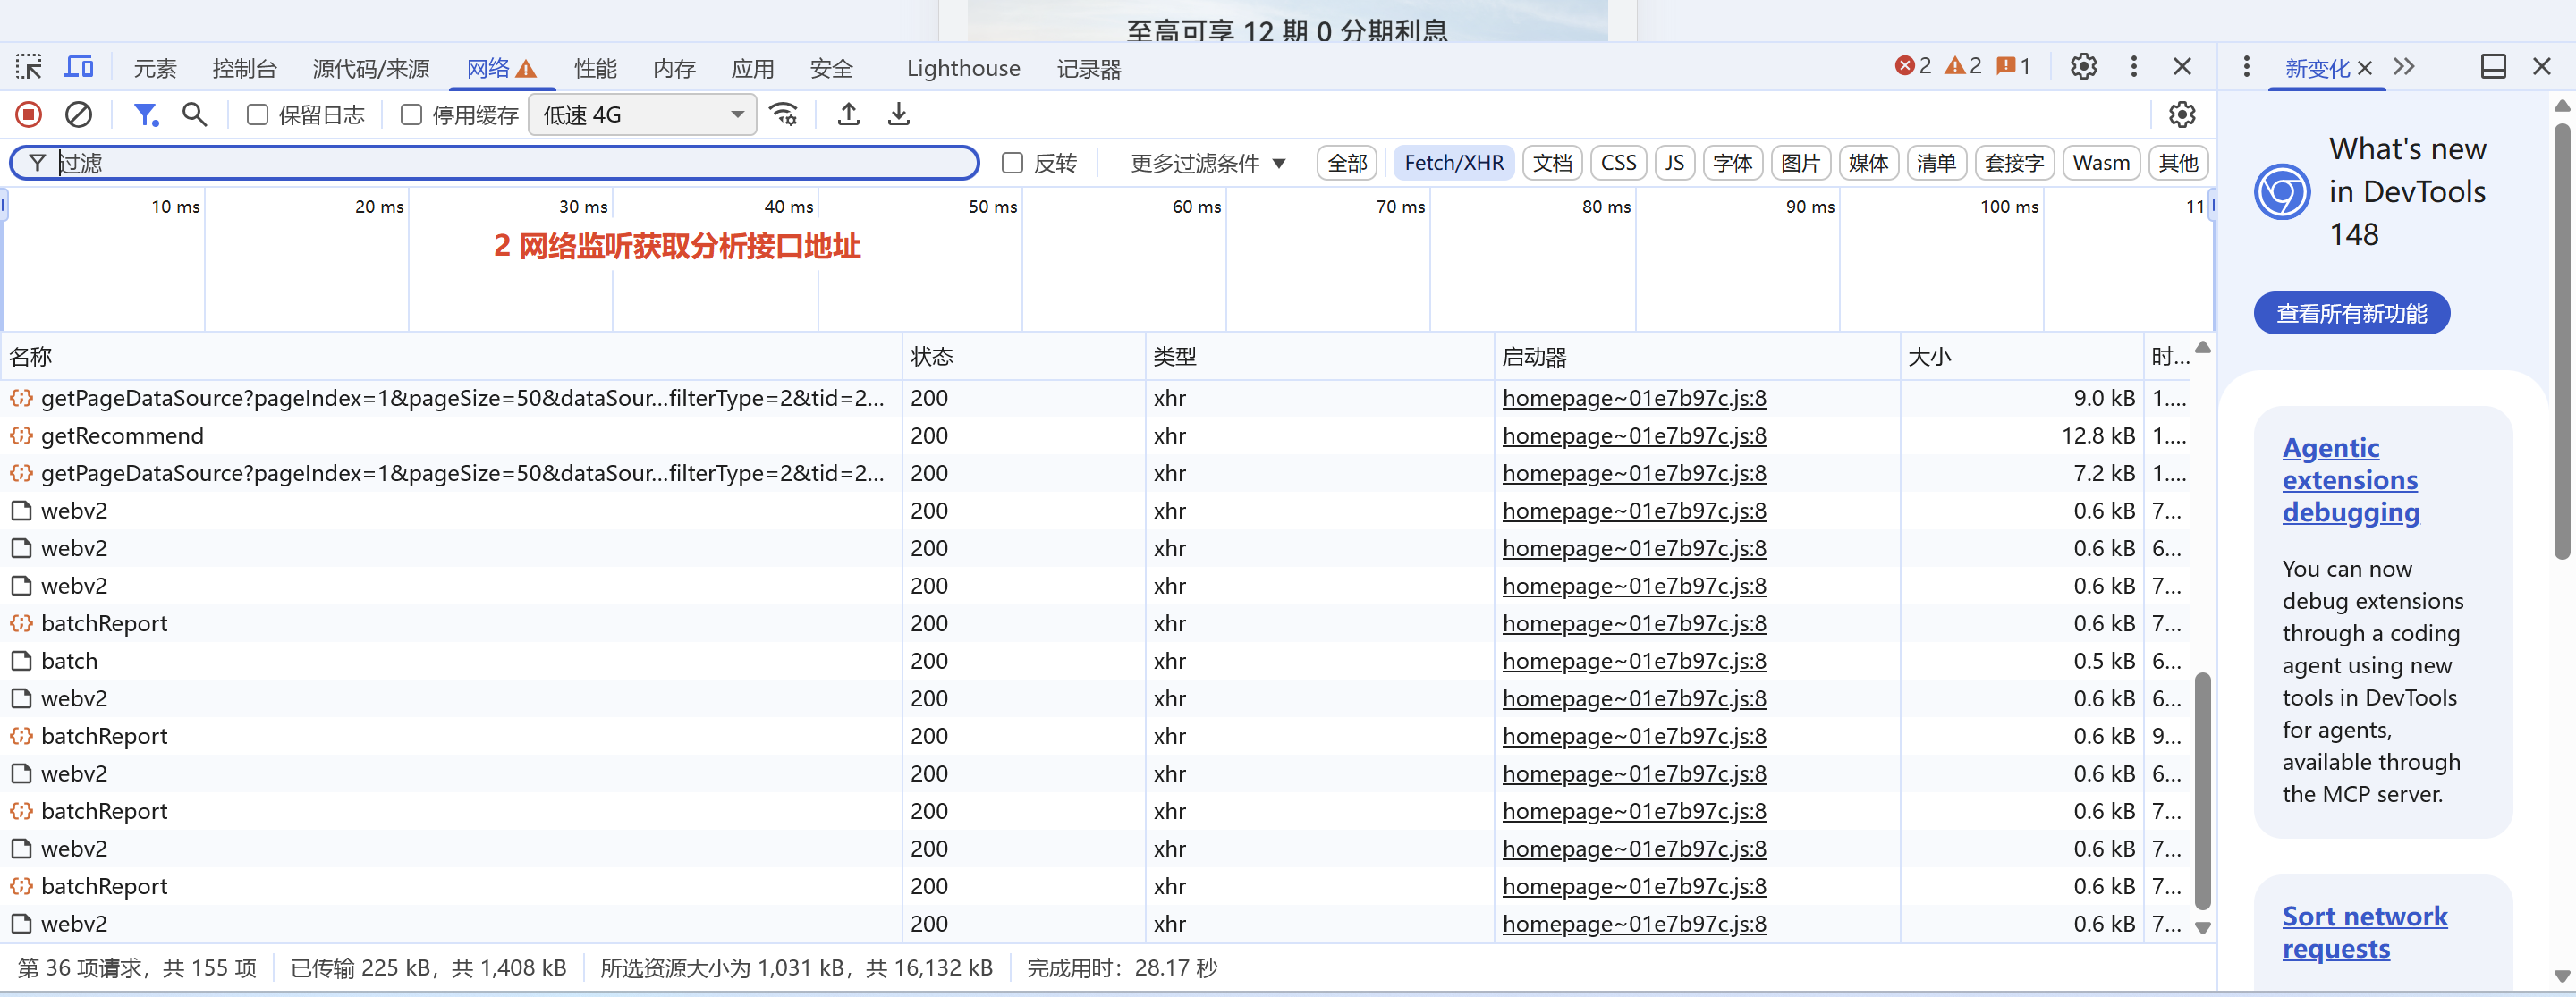
请求地址
接口地址 https://openapi.vmall.com/mcp/content/getPageInfoListAsync?pageId=257&lang=zh_CN&country=CN&portal=2
请求的方式 get方式请求
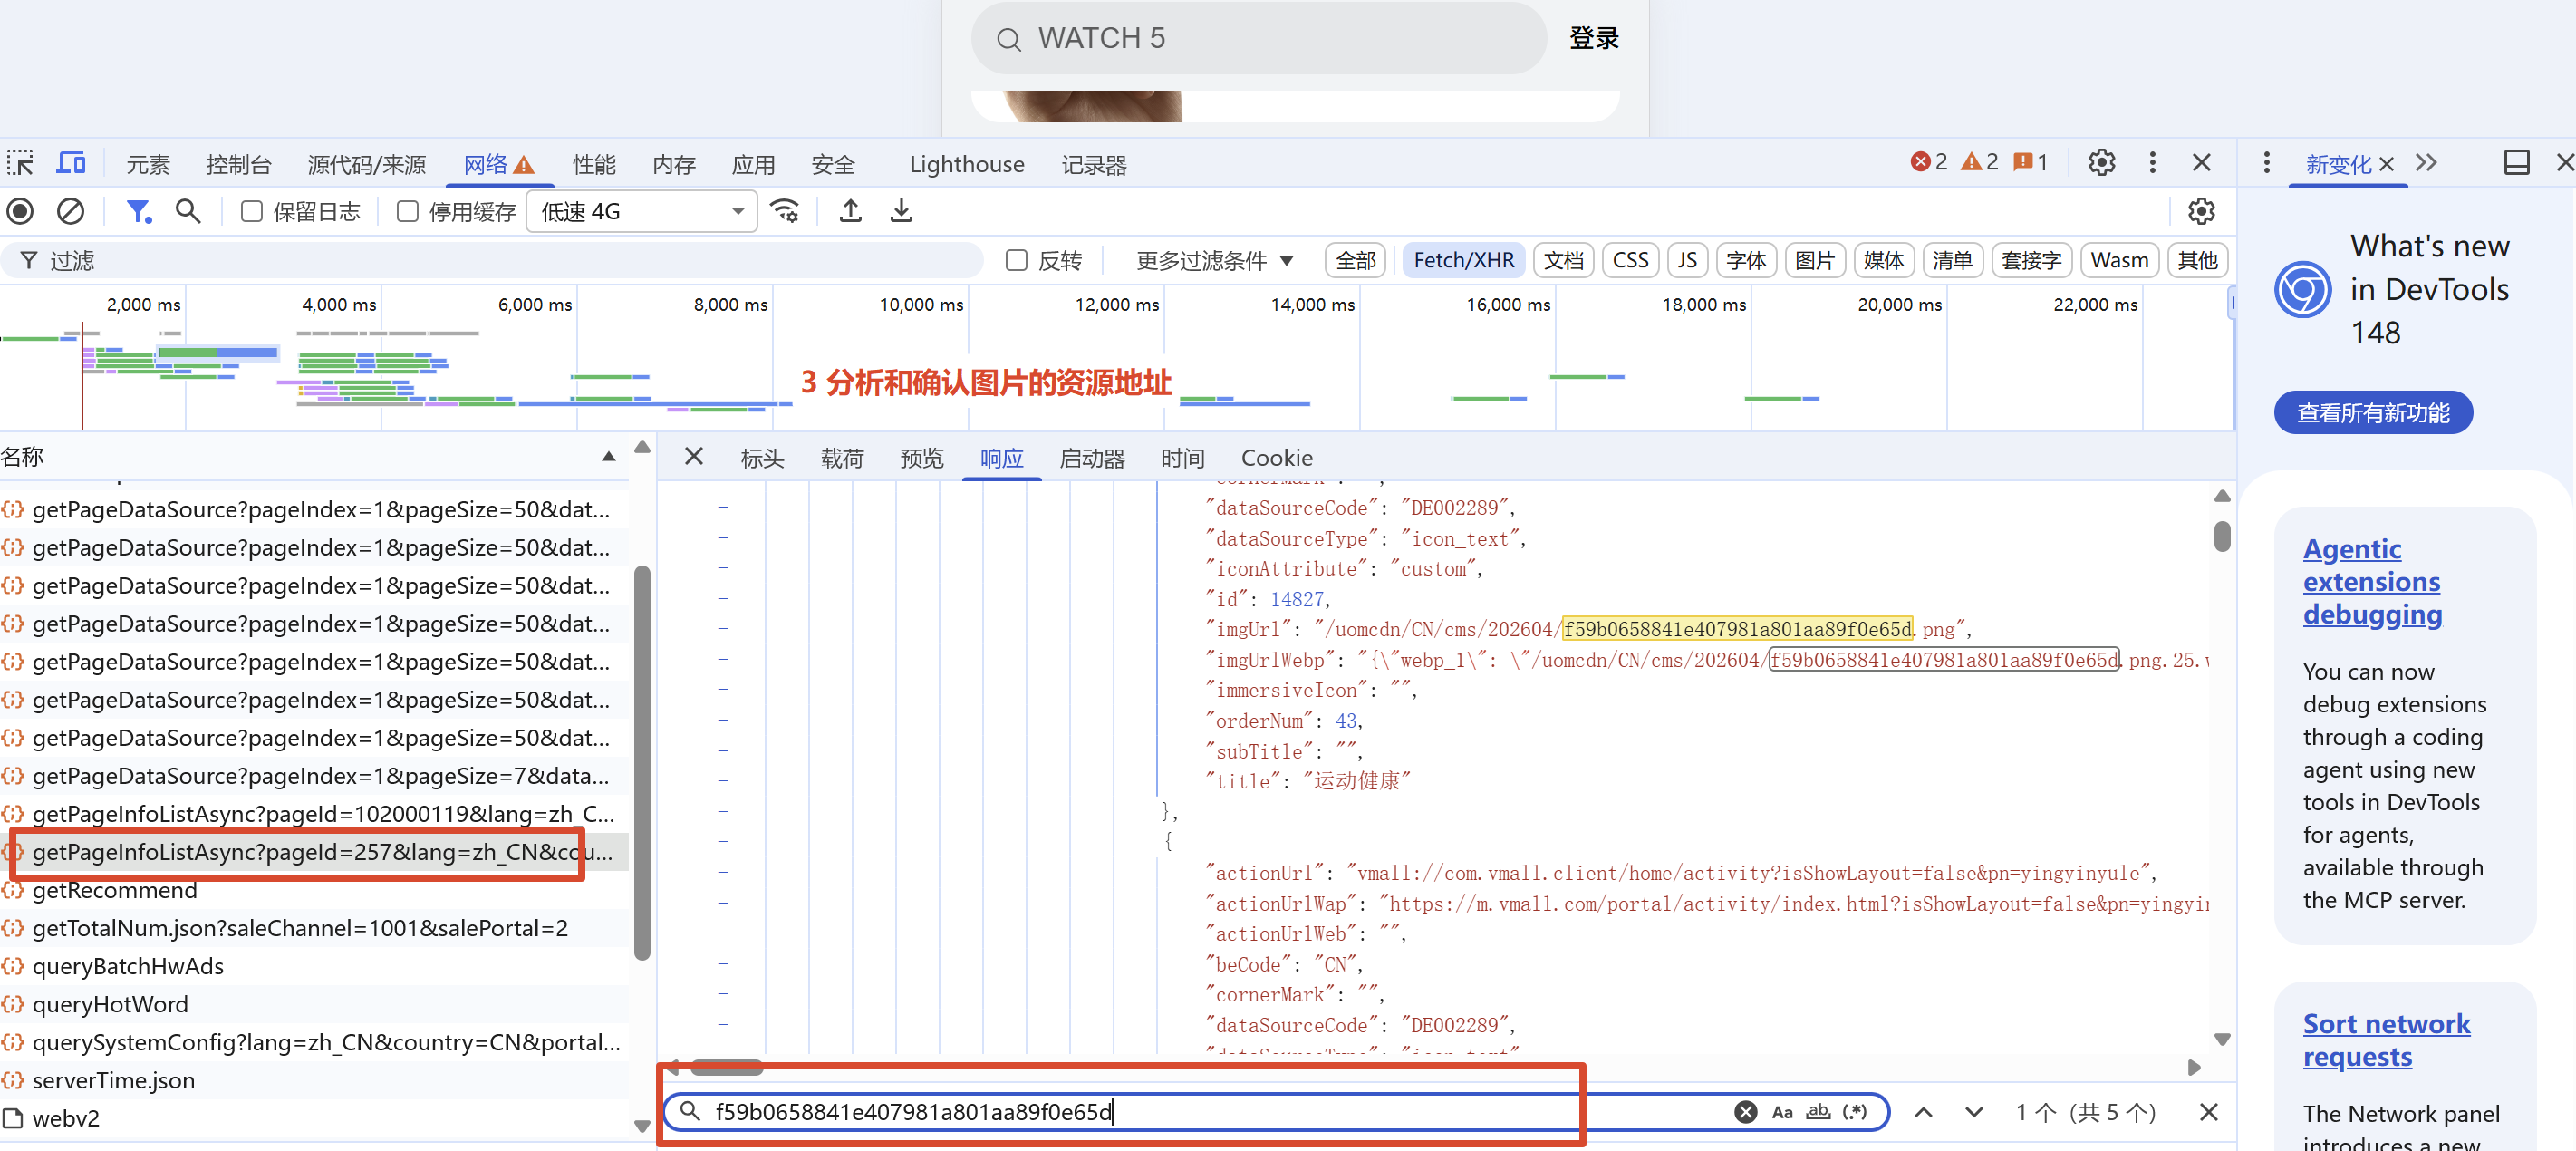
数据结构
icon
前缀 https://res.vmallres.com/
"dataSourceType": "icon_text",
"imgUrl": "/uomcdn/CN/cms/202604/f59b0658841e407981a801aa89f0e65d.png",
"title": "运动健康"
轮播图
前缀 https://res.vmallres.com/
"dataSourceType": "ad",
"imgUrl": "/uomcdn/CN/cms/202605/cfd570299d484125926c7c15b2d3761b.jpg",
数据请求
华为首页地址


https://openapi.vmall.com/mcp/content/getPageInfoListAsync?pageId=257&lang=zh_CN&country=CN&portal=2


API


在第二页中
要获取轮播图
图片的完整url路径

轮播图结构
"dataSourceType": "ad",的都是轮播图
前缀 https://res.vmallres.com/
"imgUrl": "/uomcdn/CN/cms/202512/c11151abbcb744d7804e8e66a22119ec.jpg",
"title": "血压表",

dataInfos里面的icon图片
icon图片的结构
"dataSourceType": "icon_text",
前缀 https://res.vmallres.com/
"imgUrl": "/uomcdn/CN/cms/202604/32b823a7efff4988a770c89925a2032b.png",
"title": "华为手机"

将轮播图和icon图片的信息 分别存到不同的变量中
数据绑定【动态数据绑定】
<swiper class="sw" indicator-dots="true" autoplay interval="2000" duration="2000" indicator-color="rgba(200,0,0,0.3)"   indicator-active-color="rgb(0,200,0)">
  <swiper-item wx:for="{{swiperList}}" wx:key="title">
    <image src="{{item.url}}" mode="widthFix" class="image" />
  </swiper-item>
</swiper>

<!-- 2 滚动条开启  -->
<scroll-view class="icon" scroll-x="true" >
    <view class="icon-item" wx:for="{{iconList}}" wx:key="title">
      <view class="icon-img">
        <image src="{{item.url}}" mode="widthFix"/>
      </view>
        <view>{{item.title}}</view>
    </view>
</scroll-view>

<!-- 2 滚动条结束 -->
wx.request调接口不含模拟数据page2.js
含数据的page2.js

day4 AI集成
0 复习
1 小程序发布 注册==》小程序备案==》代码审核==》小程序发布 同一个身份证5个
2 选项卡 tabbar
3 导航栏显示标题 需要json里面开启Components 添加 navigation-bar
4 登录页 图片+表单+js数据验证
5 动态数据绑定
    通过图片链接==》分析和获取图片接口 ==》通过js的wx.request调用接口
    页面中渲染动态数据 使用wx:for


page4 增加阴影效果
1 【点一下 获取数据】自己找的接口 获取图片
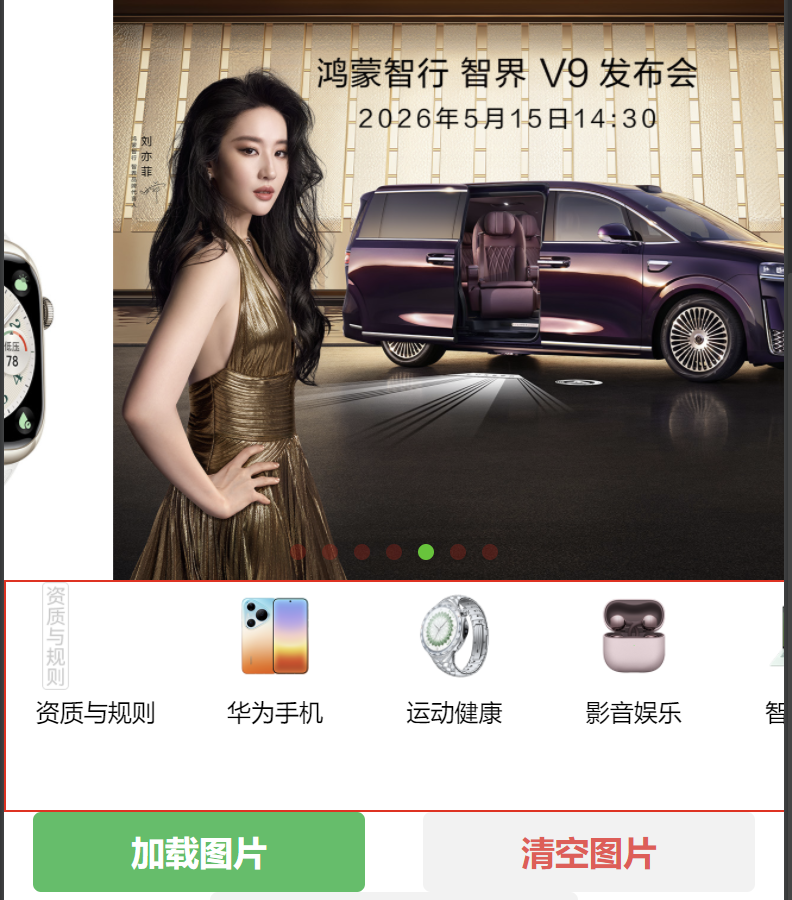
<button type="primary" bindtap="loadImages">加载图片</button>
<button type="warn" bindtap="clearImages">清空图片</button>
// 加载图片按钮
loadImages() {
  this.getHomeData()   // 调已有的请求方法
},

// 清空图片按钮
clearImages() {
  this.setData({
    swiperList: [],    // 轮播图清空
    iconList: []       // icon 清空
  })
},
2 【点点点】选项卡
新闻资讯页面 点击选项卡
wxml
<!--index.wxml-->
<navigation-bar title="首页" back="{{false}}" color="black" background="#FFF"></navigation-bar>
<!-- 选项卡 Tab 栏(写死,不依赖 JS 数据) -->
<scroll-view class="tab-scroll" scroll-x="true">
<view class="tab-list">
<view
class="tab-item {{activeTab === 'home' ? 'active' : ''}}"
bindtap="switchTab"
data-type="home"
>首页</view>
<view
class="tab-item {{activeTab === 'other1' ? 'active' : ''}}"
bindtap="switchTab"
data-type="other1"
>其他1</view>
<view
class="tab-item {{activeTab === 'other2' ? 'active' : ''}}"
bindtap="switchTab"
data-type="other2"
>其他2</view>
</view>
</scroll-view>
<!-- Tab 内容区 -->
<scroll-view class="content-area" scroll-y="true" type="list">
<!-- 首页 Tab -->
<view wx:if="{{activeTab === 'home'}}" class="tab-content">
<view class="container">
<view class="what">今天的天气怎么样</view>
<text user-select="true" class="weather">长春今天 ☀️ 18℃ </text>
<image src="/static/xiaoxin.png" class="xiaoxin" mode="widthFix"/>
<image src="/static/xiaoxin2.gif" mode=""/>
</view>
</view>
<!-- 其他1 Tab -->
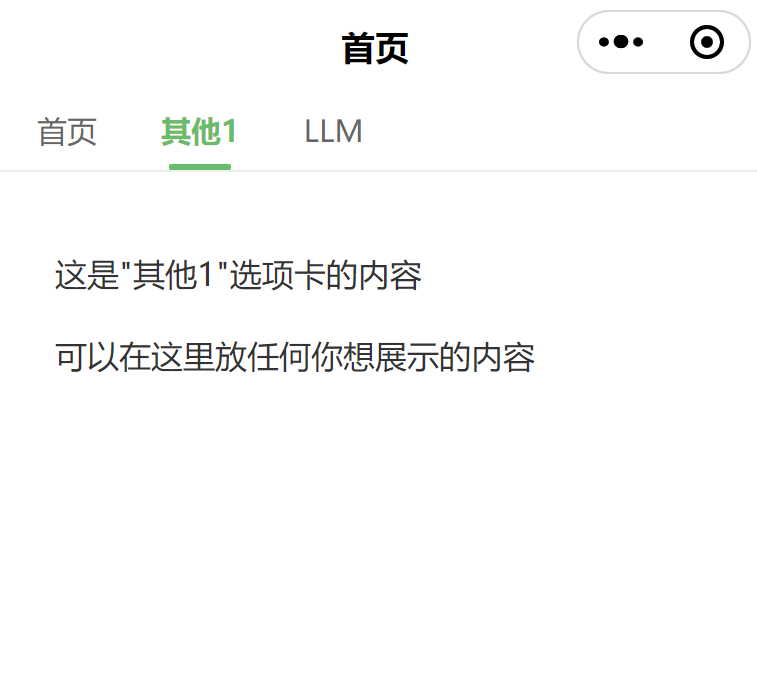
<view wx:if="{{activeTab === 'other1'}}" class="tab-content">
<view class="other-page">
<text class="other-text">这是"其他1"选项卡的内容</text>
<text class="other-text">可以在这里放任何你想展示的内容</text>
</view>
</view>
<!-- 其他2 Tab -->
<view wx:if="{{activeTab === 'other2'}}" class="tab-content">
<view class="other-page">
<text class="other-text">这是"其他2"选项卡的内容</text>
<text class="other-text">通知公告、使用帮助、关于我们等等</text>
</view>
</view>
</scroll-view>
JS
Page({
  data: {
    activeTab: 'home'   // 默认选中首页
  },

  // 切换选项卡
  switchTab(e) {
    this.setData({ activeTab: e.currentTarget.dataset.type })
  }
})
WXSS
/* ========== 选项卡横向滚动 ========== */
.tab-scroll {
  width: 100%;
  white-space: nowrap;
  background: #fff;
  border-bottom: 1rpx solid #eee;
}

.tab-list {
  display: flex;
  padding: 0 20rpx;
}

.tab-item {
  display: inline-block;
  padding: 20rpx 32rpx;
  font-size: 30rpx;
  color: #666;
  position: relative;
}

.tab-item.active {
  color: #07c160;
  font-weight: bold;
}

/* 选中态下划线 */
.tab-item.active::after {
  content: '';
  position: absolute;
  left: 50%;
  bottom: 0;
  transform: translateX(-50%);
  width: 60rpx;
  height: 6rpx;
  border-radius: 3rpx;
  background: #07c160;
}

/* ========== 内容区 ========== */
.content-area {
  height: calc(100vh - 200rpx);
}

.tab-content {
  padding: 30rpx;
}


/* ========== 其他页样式 ========== */
.other-page {
  padding: 40rpx;
}

.other-text {
  display: block;
  font-size: 32rpx;
  color: #333;
  line-height: 60rpx;
  margin-bottom: 20rpx;
}
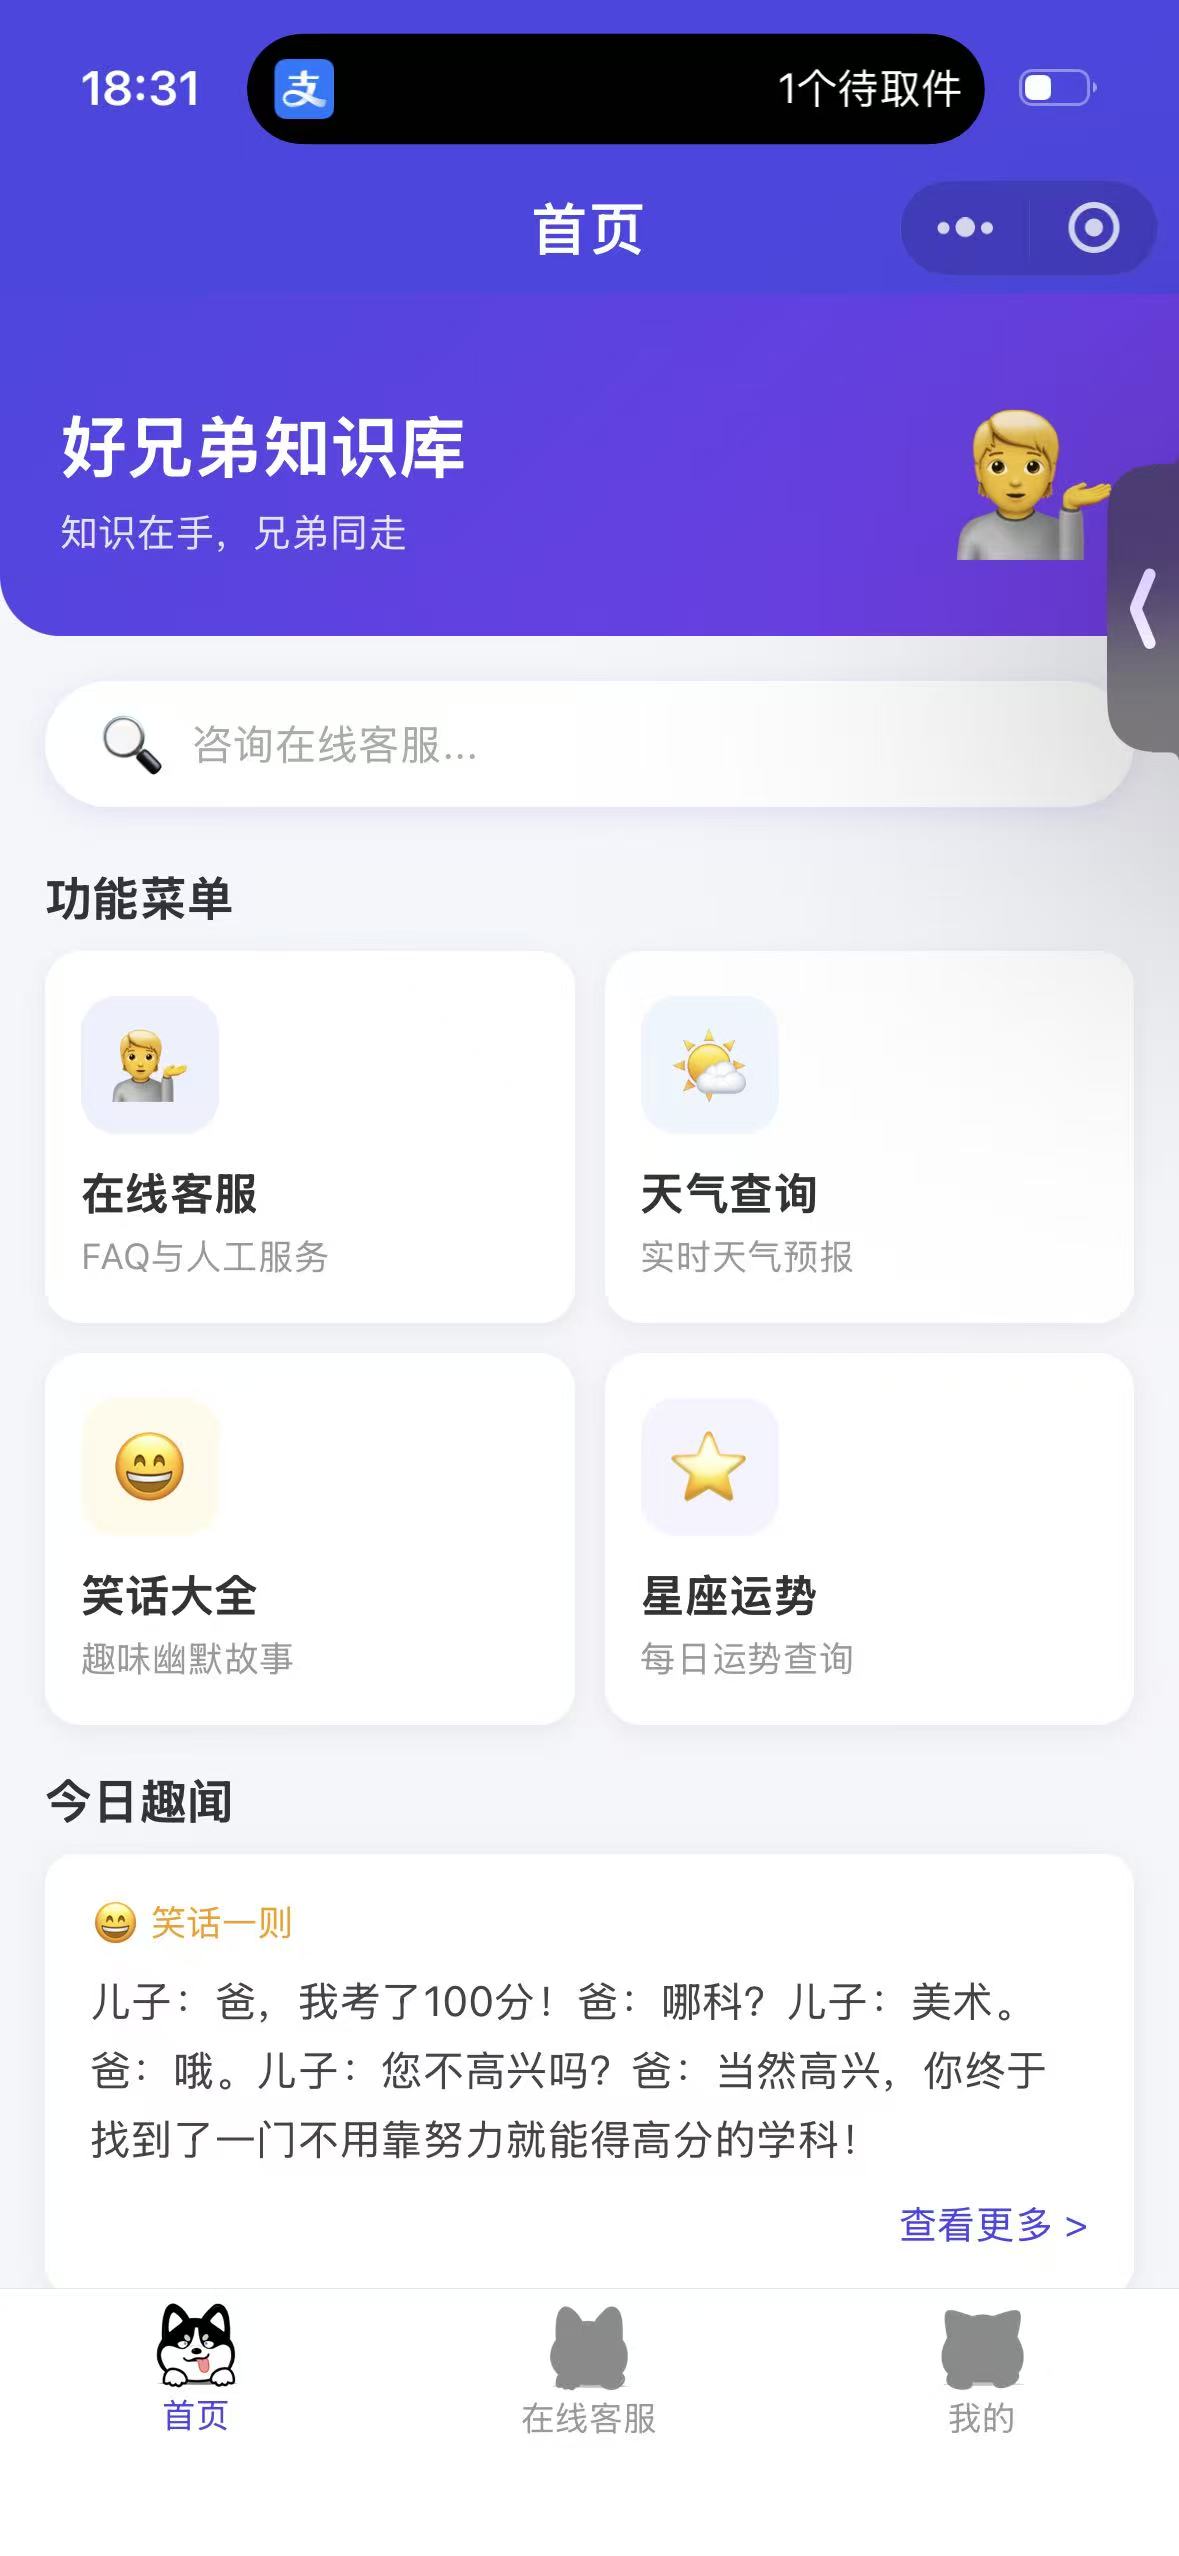
3 【点一下 获取数据】付费API接口 数据请求
点击随机生成一条趣事
像 FastMock、Apifox、Easy Mock 这种在线平台。你可以在上面定义接口结构,它会给你一个 URL。
C:\Users\vivi\Desktop\WXMP\try3 项目地址
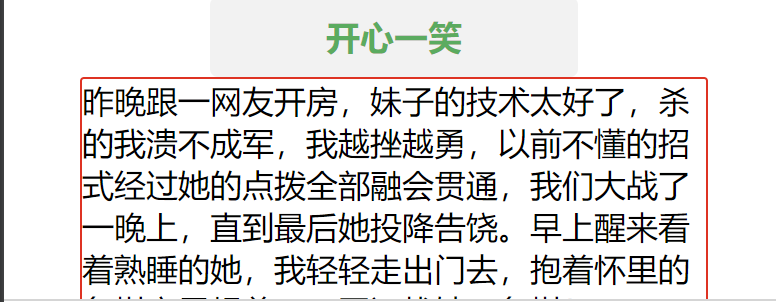
将page3修改一下 有个小标题 开心一整天 右边一个按钮 点一下随机生成
api地址 https://v.juhe.cn/joke/randJoke
appkey 你自己的key
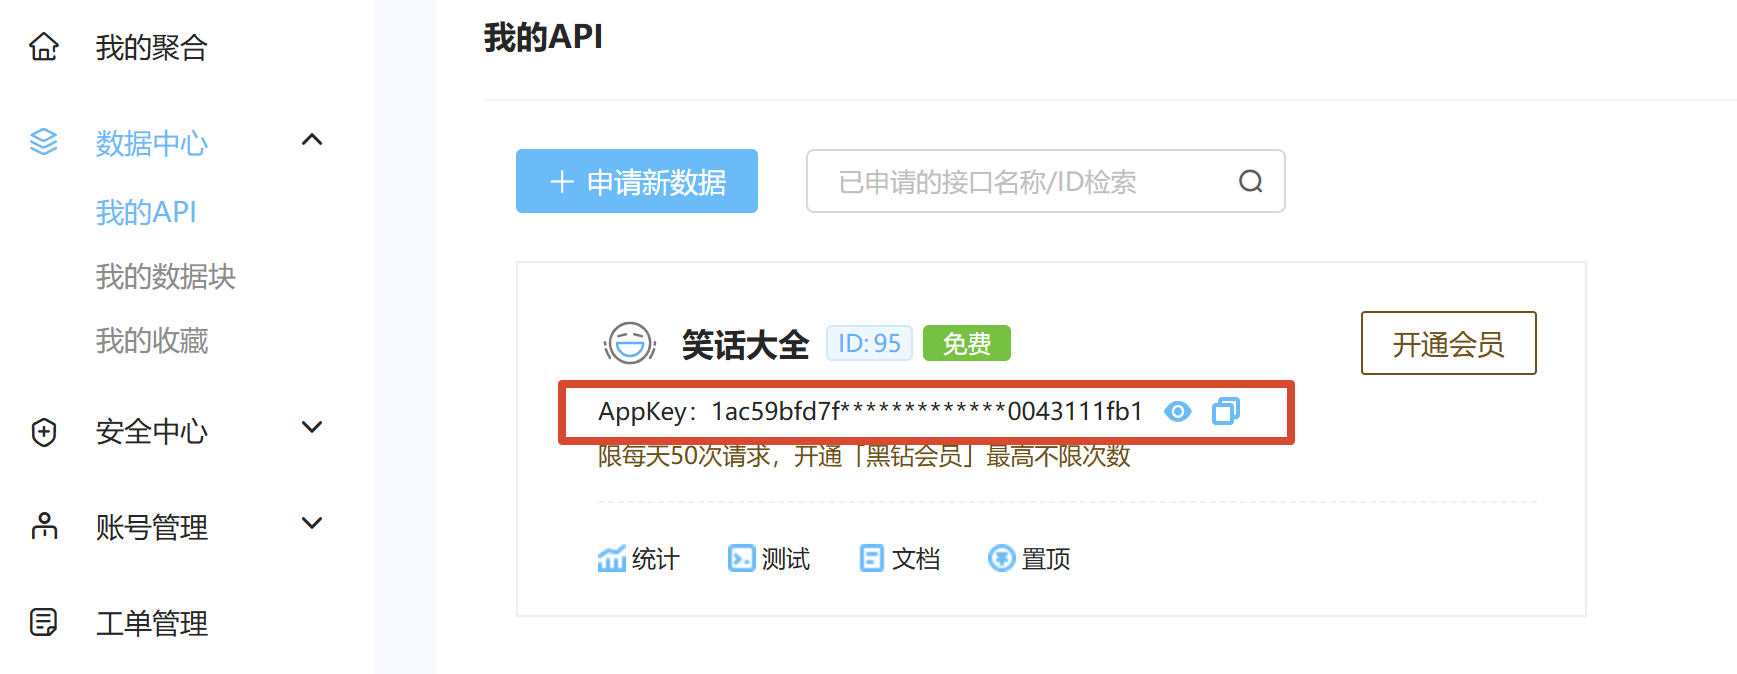
获取笑话
getJoke(){
    wx.request({
      url: 'https://v.juhe.cn/joke/randJoke.php',
      data: {
        key: '你自己的key'
      },
      method: 'GET',
      success: (res) => {
        console.log('【笑话接口返回】', res.data)
        const d = res.data
        // 聚合接口返回格式:{ result: [ { content, ... } ], error_code: 0 }
        if (d.error_code === 0 && d.result && d.result.length) {
          this.setData({
            joke: d.result[0].content
          })
        } else {
          console.error('笑话接口错误', d.reason)
          this.setData({ joke: '笑话加载失败:' + (d.reason || '未知错误') })
        }
      },
      fail: (err) => {
        console.error('笑话请求失败', err)
        this.setData({ joke: '网络请求失败' })
      }
    })
  },
表单提交自己key
// data 新增两个字段
inputKey: "",   // 输入框临时值
key: "",        // 保存后使用的 key

// input 输入
onKeyInput(e) {
  this.setData({ inputKey: e.detail.value })
},

// 保存按钮
saveKey() {
  const key = this.data.inputKey
  if (!key) { wx.showToast({ title: '请先填写key', icon: 'none' }); return }
  this.setData({ key })
  wx.showToast({ title: 'key保存成功', icon: 'success' })
},

// 获取笑话,从 data.key 取参数
getJoke(){
  const key = this.data.key
  if (!key) { wx.showToast({ title: '请先填写并保存key', icon: 'none' }); return }
  wx.request({
    url: 'https://v.juhe.cn/joke/randJoke.php',
    data: { key: key },
    method: 'GET',
      success: (res) => {
        console.log('【笑话接口返回】', res.data)
        const d = res.data
        // 聚合接口返回格式:{ result: [ { content, ... } ], error_code: 0 }
        if (d.error_code === 0 && d.result && d.result.length) {
          this.setData({
            joke2: d.result[0].content
          })
        } else {
          console.error('笑话接口错误', d.reason)
          this.setData({ joke2: '笑话加载失败:' + (d.reason || '未知错误') })
        }
      },
      fail: (err) => {
        console.error('笑话请求失败', err)
        this.setData({ joke2: '网络请求失败' })
      }
  })
}
<view class="inp">
        <input type="text" placeholder="请输入密钥" bindinput="onKeyInput" value="{{inputKey}}" />
</view>
<button type="default" bindtap="saveKey">保存</button>
<button type="primary" bindtap="getJoke2"> 开心两下 </button>
<view class="jokeContent">
    {{joke2}}
</view>
4 AI介绍
5 LLM集成

WXML
  <!-- 1. API Key 输入 -->
  <view class="llm-section">
    <input class="llm-input"placeholder="输入 API Key"value="{{inputKey}}"  <!-- 改这里:原来绑的是apiKey -->
           bindinput="onKeyInput"/>
    <button class="llm-btn" type="primary" bindtap="saveApiKey">保存</button>
  </view>

    <!-- 2. 问题输入 -->
    <view class="llm-section">
      <input class="llm-input"
             placeholder="输入你的问题"
             value="{{question}}"
             bindinput="onQuestionInput"/>
      <button class="llm-btn" type="primary" bindtap="sendQuestion">发送</button>
    </view>

    <!-- 3. 对话记录 -->
    <scroll-view class="llm-chat" scroll-y="true">
      <view wx:for="{{messages}}" wx:key="index"
            class="llm-msg {{item.role === 'user' ? 'msg-user' : 'msg-ai'}}">
        <text>{{item.role === 'user' ? '我:' : 'AI:'}}{{item.content}}</text>
      </view>
      <view wx:if="{{loading}}" class="llm-msg msg-ai">
        <text>AI 正在回复...</text>
      </view>
    </scroll-view>
JS
// index.js
Page({
  data: {
    activeTab: 'home',
    apiKey: '',       // 保存的 key
    inputKey: '',     // key 输入框临时值
    question: '',     // 问题输入
    messages: [],     // 对话记录
    loading: false
  },

  // 切换选项卡
  switchTab(e) {
    this.setData({ activeTab: e.currentTarget.dataset.type })
  },

  // 输入 API Key
  onKeyInput(e) {
    this.setData({ inputKey: e.detail.value })
  },

  // 保存 Key
  saveApiKey() {
    if (!this.data.inputKey) {
      wx.showToast({ title: '请先输入Key', icon: 'none' })
      return
    }
    this.setData({ apiKey: this.data.inputKey })
    wx.showToast({ title: 'Key保存成功', icon: 'success' })
  },

  // 输入问题
  onQuestionInput(e) {
    this.setData({ question: e.detail.value })
  },

  // 发送问题
  sendQuestion() {
    const { apiKey, question, messages } = this.data
    if (!apiKey) {
      wx.showToast({ title: '请先保存API Key', icon: 'none' })
      return
    }
    if (!question) {
      wx.showToast({ title: '请输入问题', icon: 'none' })
      return
    }
    if (this.data.loading) return

    // 把用户问题加入对话记录(前端展示用)
    const newMessages = [...messages, { role: 'user', content: question }]
    this.setData({ messages: newMessages, loading: true, question: '' })

    // ✅ 只把合法角色的消息发给 API(过滤掉可能残留的 role:'ai' 等)
    const messagesToSend = [
      { role: 'system', content: '你是一个简洁有用的助手,用中文简短回答。' },
      ...newMessages
        .filter(m => ['user','assistant','system'].includes(m.role))
        .map(m => ({ role: m.role, content: m.content }))
    ]

    wx.request({
      url: 'https://api.moonshot.cn/v1/chat/completions',
      method: 'POST',
      header: {
        'Content-Type': 'application/json',
        'Authorization': 'Bearer ' + apiKey
      },
      data: {
        model: 'moonshot-v1-8k',
        messages: messagesToSend
      },
      success: (res) => {
        if (res.data?.choices?.[0]?.message?.content) {
          const reply = res.data.choices[0].message.content
          this.setData({
            messages: [...this.data.messages, { role: 'assistant', content: reply }],
            loading: false
          })
        } else {
          // 把 API 错误详情也显示出来,方便排错
          const errMsg = res.data?.error?.message || '未获取到回复'
          console.error('Moonshot 错误返回:', res.data)
          this.setData({
            messages: [...this.data.messages, { role: 'assistant', content: 'AI回复失败:' + errMsg }],
            loading: false
          })
        }
      },
      fail: (err) => {
        console.error('请求失败:', err)
        this.setData({
          messages: [...this.data.messages, { role: 'assistant', content: '网络请求失败,请检查接口地址和网络' }],
          loading: false
        })
      }
    })
  }
})
WXSS
/* ========== LLM 对话页 ========== */
.llm-section {
  display: flex;
  gap: 16rpx;
  margin-bottom: 24rpx;
  align-items: center;
}

.llm-input {
  flex: 1;
  height: 72rpx;
  border: 1rpx solid #ddd;
  border-radius: 12rpx;
  padding: 0 24rpx;
  font-size: 28rpx;
}

.llm-btn {
  font-size: 28rpx !important;
  padding: 0 32rpx !important;
  height: 72rpx !important;
  line-height: 72rpx !important;
}

.llm-chat {
  margin-top: 20rpx;
}

.llm-msg {
  padding: 20rpx;
  margin-bottom: 16rpx;
  border-radius: 12rpx;
  font-size: 28rpx;
  line-height: 44rpx;
  word-break: break-all;
}

.msg-user {
  background: #07c160;
  color: #fff;
  margin-left: 60rpx;
}

.msg-ai {
  background: #f0f0f0;
  color: #333;
  margin-right: 60rpx;
}
课程总结
- WXML内容(8)
- view组件
- text组件
- 图片组件
- 轮播图
- 滚动条
- 视频组件
- 选项卡
- 欢迎页面 /广告页面
- WXSS样式(2)
- 盒子结构 内边距、外边距、边框
- 弹性盒子
- json全局(1)
- 导航条
- js 数据和交互(6)
- js数据交互
- 页面跳转
- 动态数据绑定wx:for
- 爬取接口自己寻找接口
- 聚合接口网站,调用接口API
- LLM大语言模型
- 登录页+登录验证
- 部署上线,并且所有人都可以访问
- 代码上线
- 小程序备案